Teltonika
Teltonika
optiCLOUD natively supports Teltonika devices that use Codec-8 or Codec-8-extended.
For device-specific notes, supported functions, and the complete configuration of your Teltonika model, Teltonika provides the official documentation in its wiki:
Prerequisites
Before commissioning, the following should be available:
- a user account with access to your tenant in optiCLOUD
- a device created in optiCLOUD
- the IMEI of the Teltonika device
- access to the Teltonika Configurator
- a valid mobile network or GPRS configuration for the provider being used
Create the Device in optiCLOUD
First, create the Teltonika device in optiCLOUD as a new device. To do this, open the device section in the Control Center and start the wizard for creating a new device. For this step, the basic information such as name, device type, and optionally a label or description is sufficient.
The device in optiCLOUD acts as the digital twin of the physical Teltonika device. After saving, the device detail view can be opened directly.
For a general introduction to creating your first device, see Getting Started.
Set the Access Token to the IMEI
Open the Security section of the created device and select Edit Access Token there.
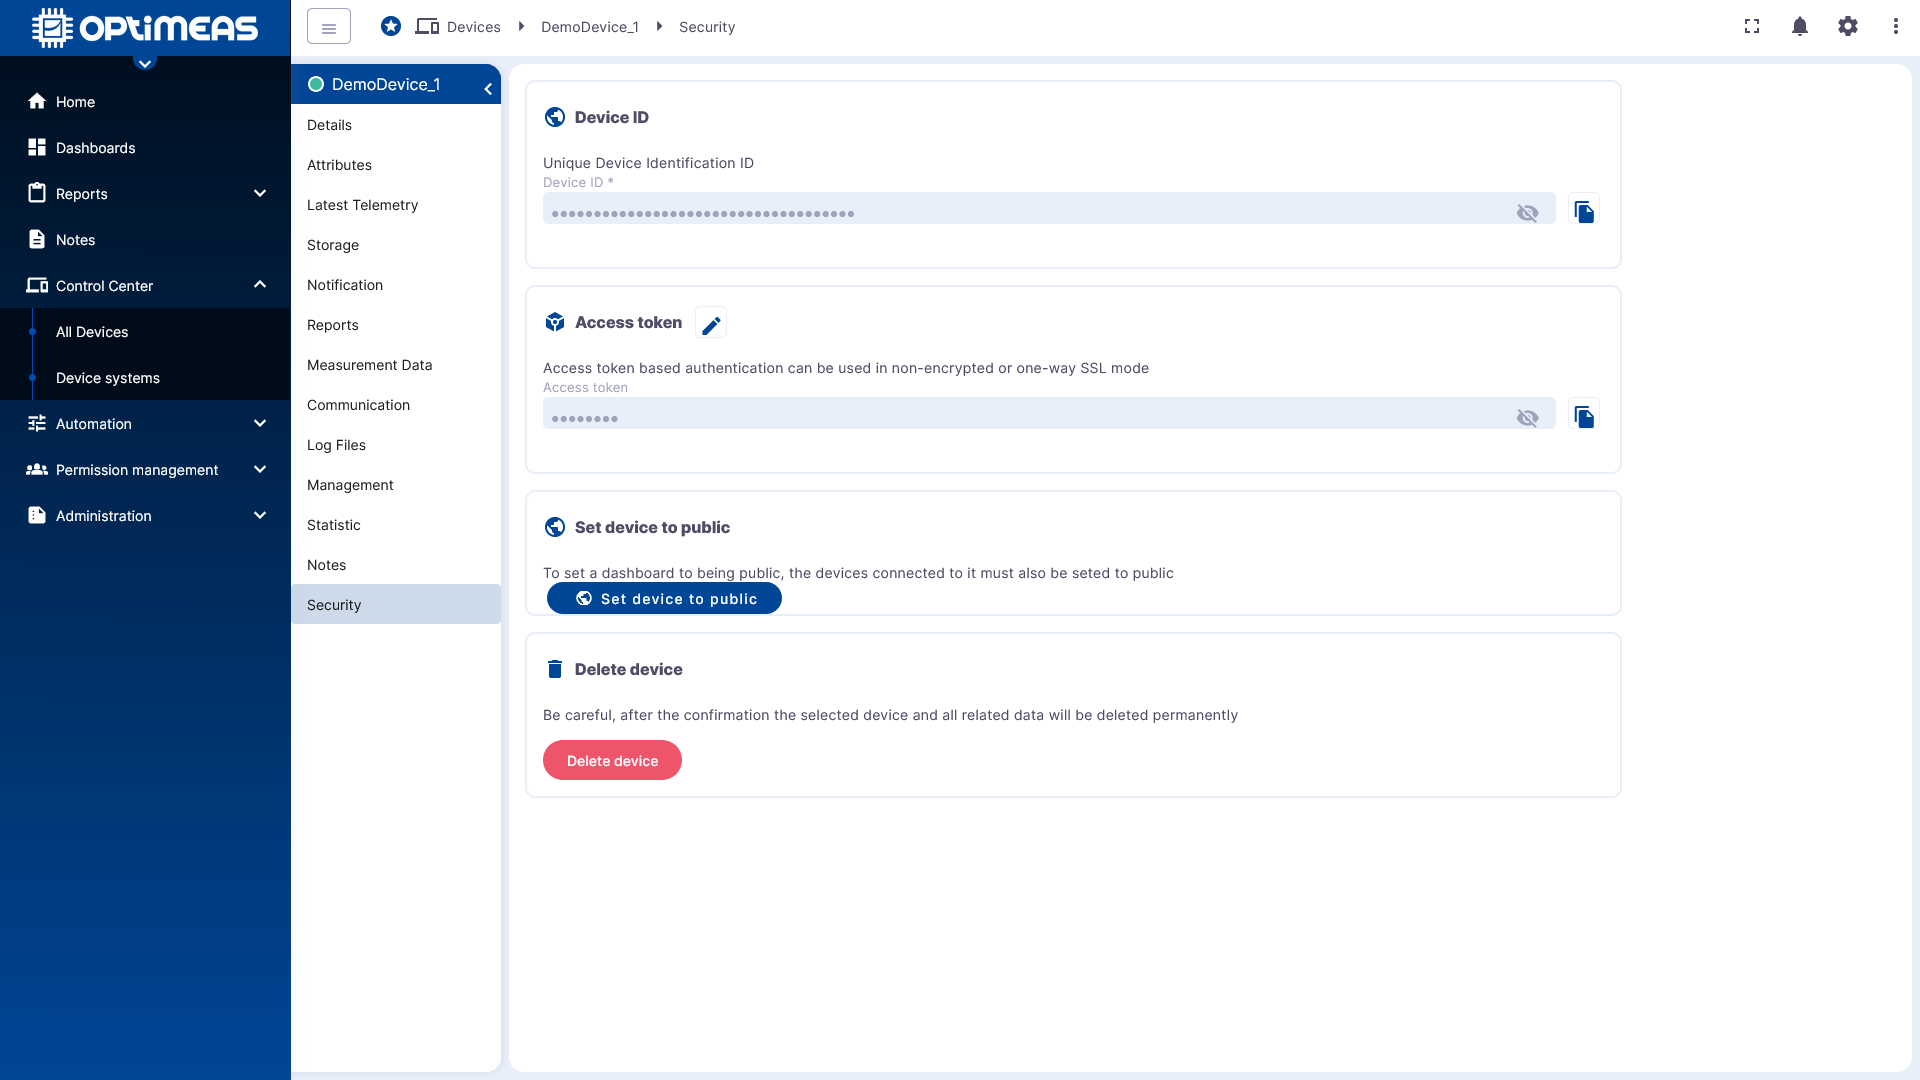
Enter the IMEI of your Teltonika device as the access token and save the change. No further settings are required in optiCLOUD for the connection itself.
The following is important:
- The access token in optiCLOUD must exactly match the IMEI of the Teltonika device.
- After that, the platform side is fully prepared.
Configure the Teltonika Configurator
The exact user interface and individual menu items may vary slightly depending on the device model. Complete step-by-step instructions can be found in the Teltonika Wiki.
To connect it to optiCLOUD, this procedure is generally sufficient:
- Download the Teltonika Device Configurator.
- Connect your Teltonika device to the PC via Bluetooth or Micro-USB.
- Open GPRS Settings and enter the GPRS data for your mobile provider.
- Then edit the Server Settings and enter the corresponding optiCLOUD URL and port for your optiCLOUD instance.
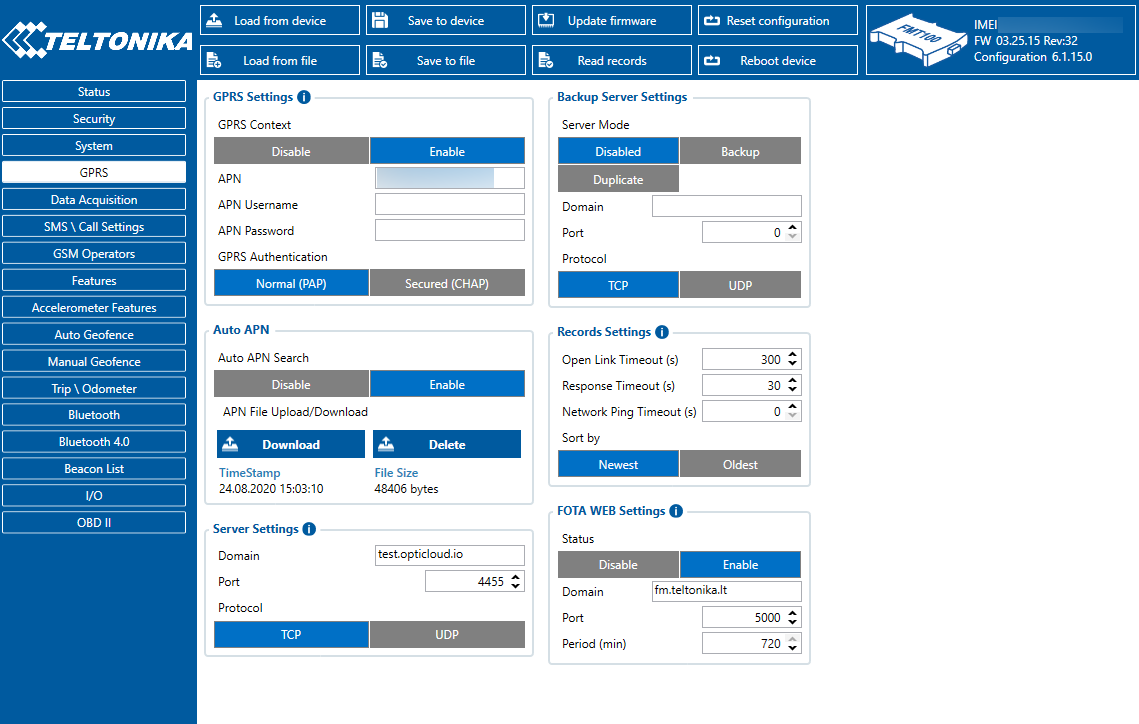
Server Settings for optiCLOUD
As the server address, enter the hostname of your optiCLOUD instance where you created the device in step 1, for example:
dashboard.opticloud.io
There are two possible port variants, depending on which protocol your Teltonika device should use to transmit the data:
- TCP with port
4455 - UDP with port
4445
Completion and First Data
Save the configuration to the Teltonika device and then wait for the first transmitted data packet. When the first data appears in optiCLOUD depends, among other things, on the configured transmission frequency and the remaining device settings.
Once data has been received, it can be checked directly in the device in optiCLOUD, for example via the current telemetry data.
Additional Notes
The connection to optiCLOUD is now complete. All further device-specific options, recording parameters, transmission intervals, and special functions are configured directly in the Teltonika ecosystem and are described in the official Teltonika documentation.