Example Fleet Management Dashboard
Example Fleet Management Dashboard
This example shows a dashboard with two views:
- a root state with a device overview shown as a table
- a details state with a detail view for the selected device
This setup is suitable for fleets, device groups, or asset lists where multiple devices are first shown together and then individual devices are viewed in more detail.
The same example pattern can be extended to any number of devices, aliases, states, and actions.
Step 1: Create the Dashboard
First, create a new dashboard. In this example, it is named Fleet Management Dashboard.
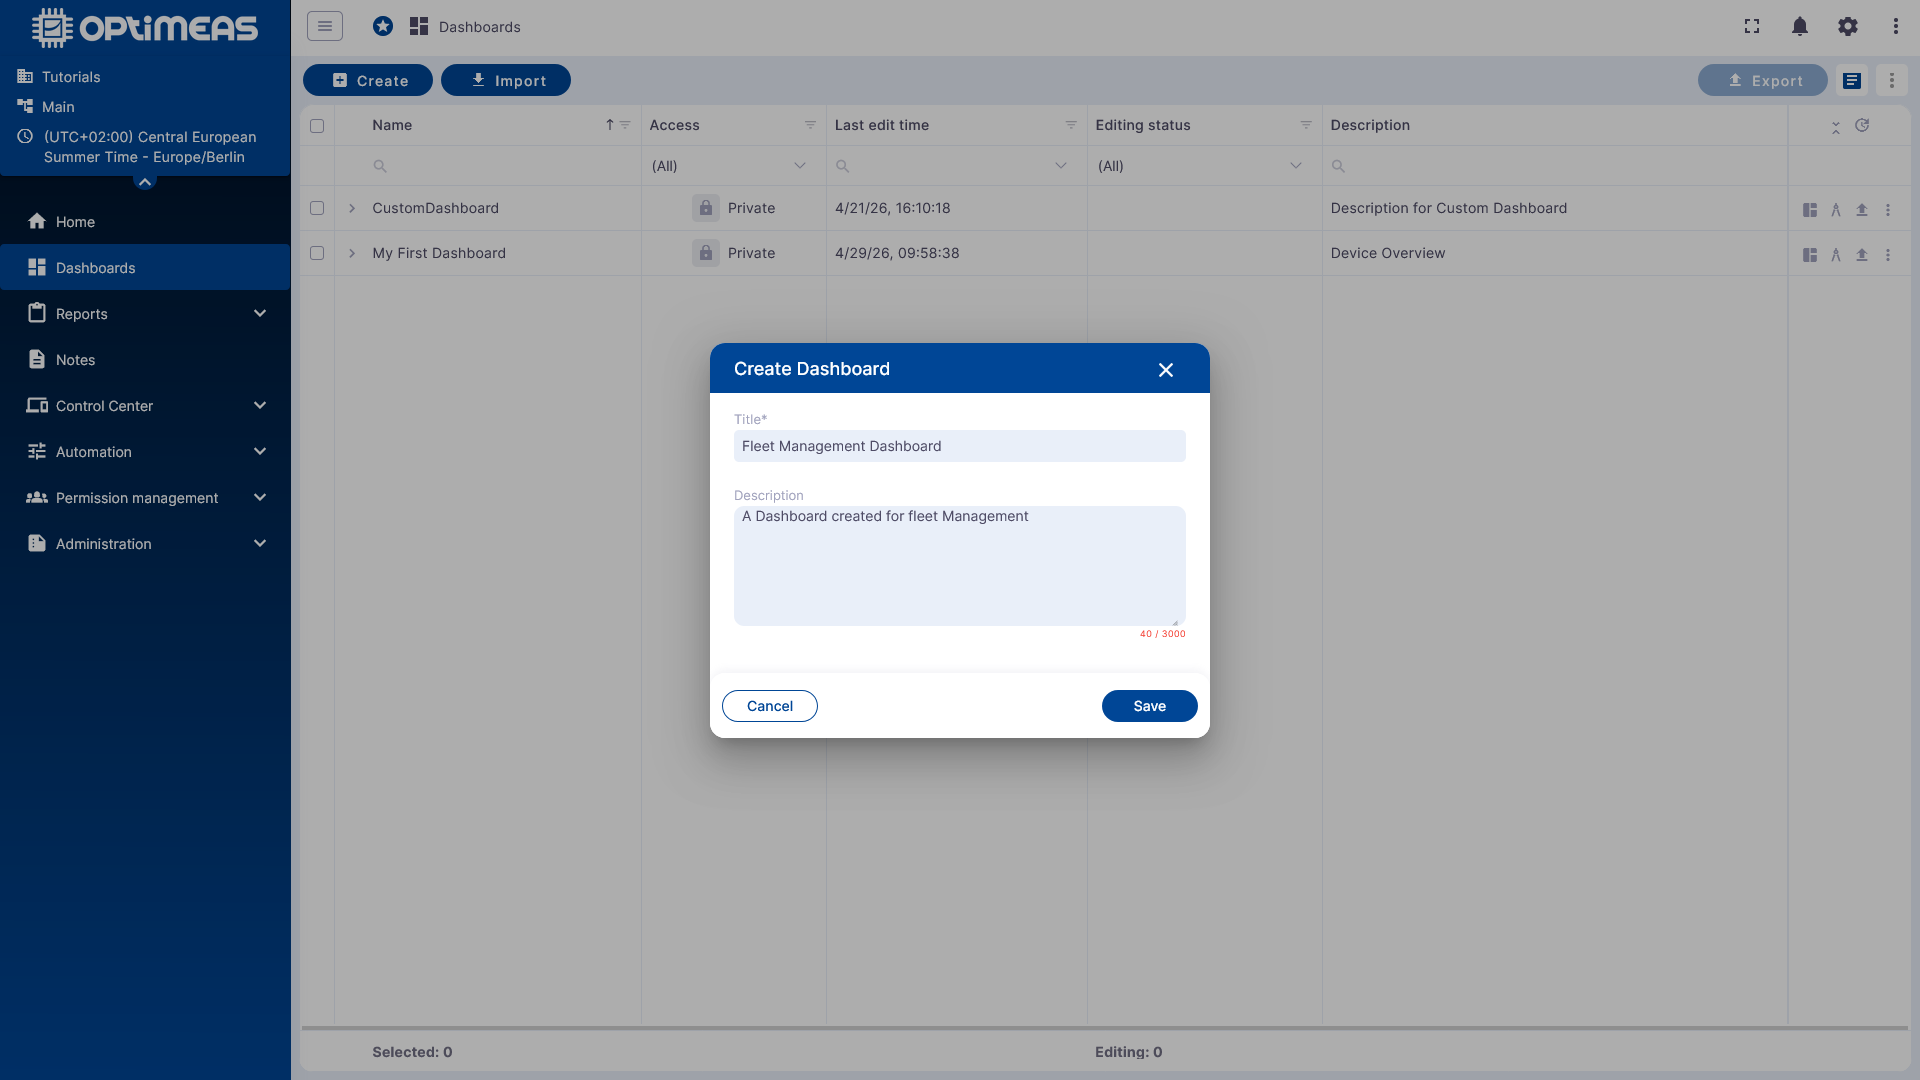
Step 2: Create an Alias for the Fleet
Next, create an alias for all devices in the fleet. In this example, the alias is named Fleet.
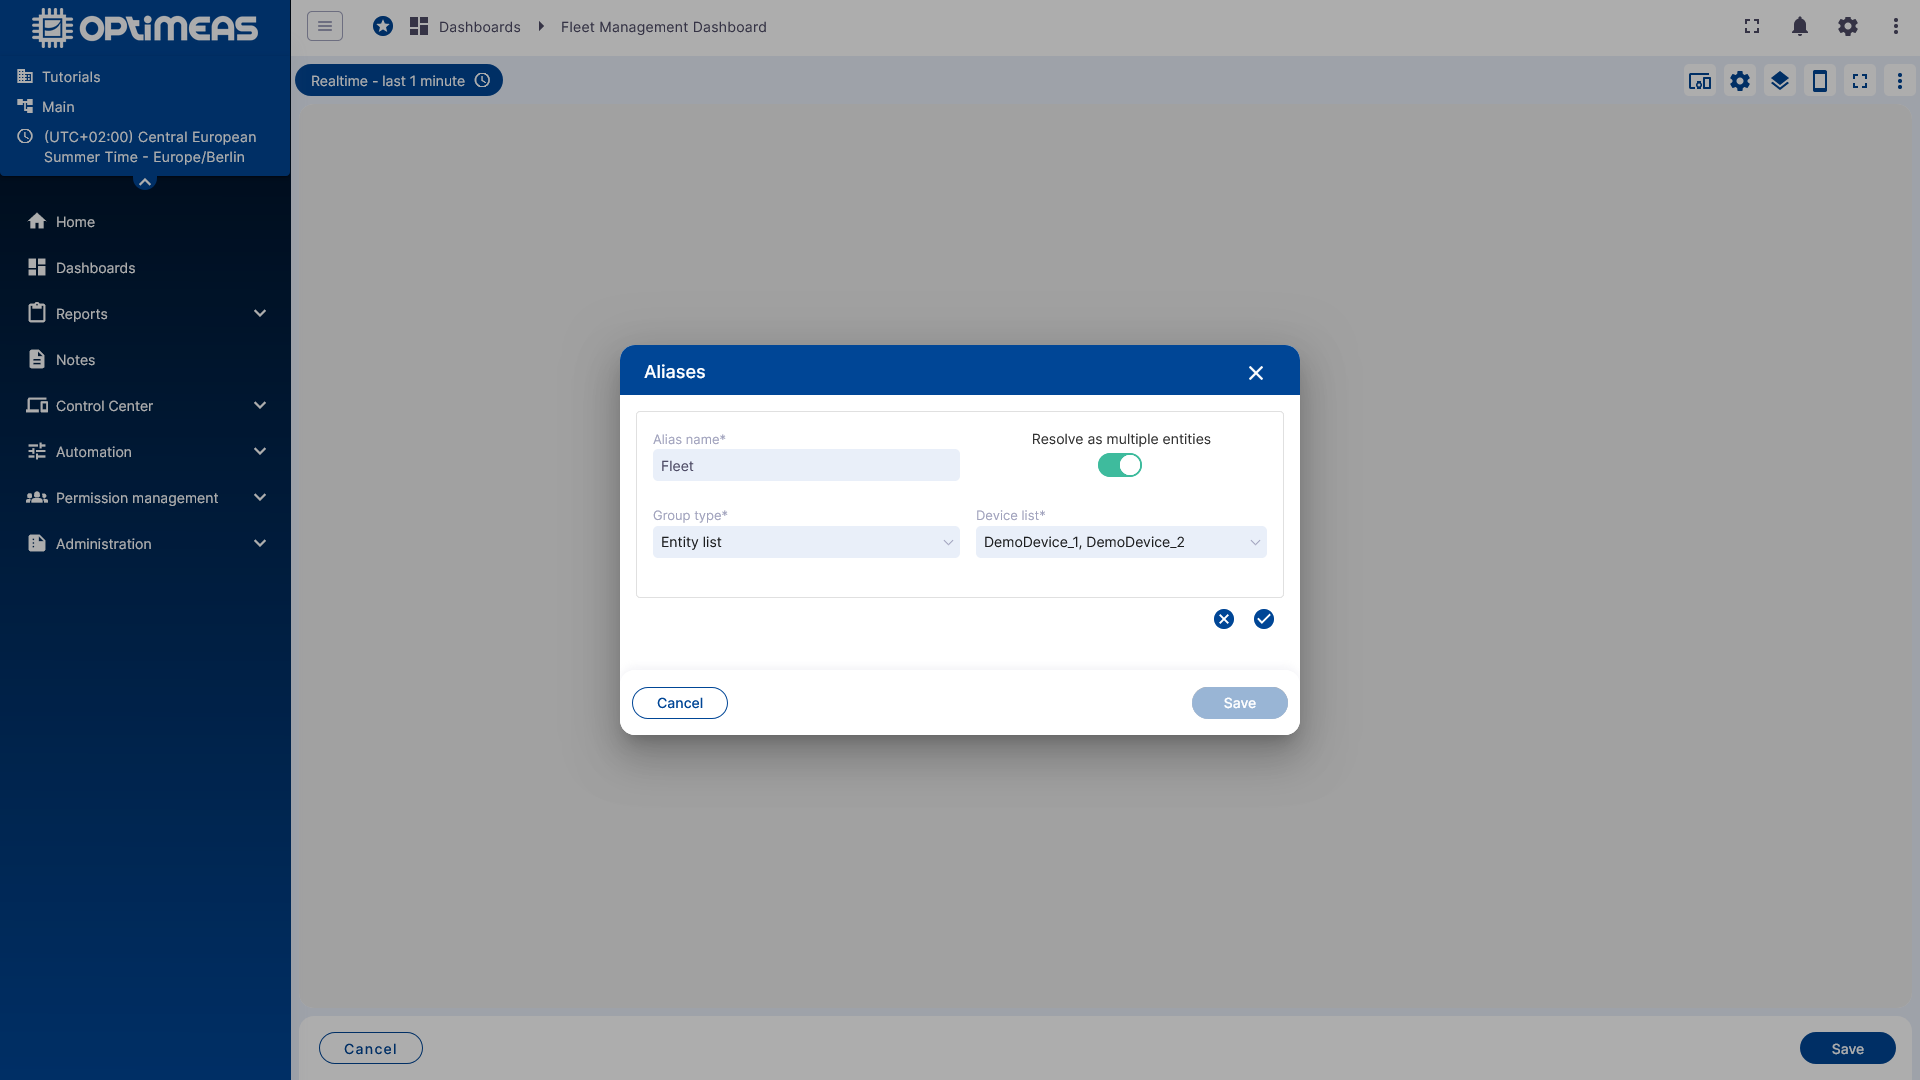
Important properties:
- Alias name: Fleet
- Resolve as multiple entities is enabled
- Group type: Entity list
- selected devices: DemoDevice_1 and DemoDevice_2
This alias will later be used as the data source for the overview table.
Step 3: Create an Alias for the Detail View
Then create a second alias named Details.
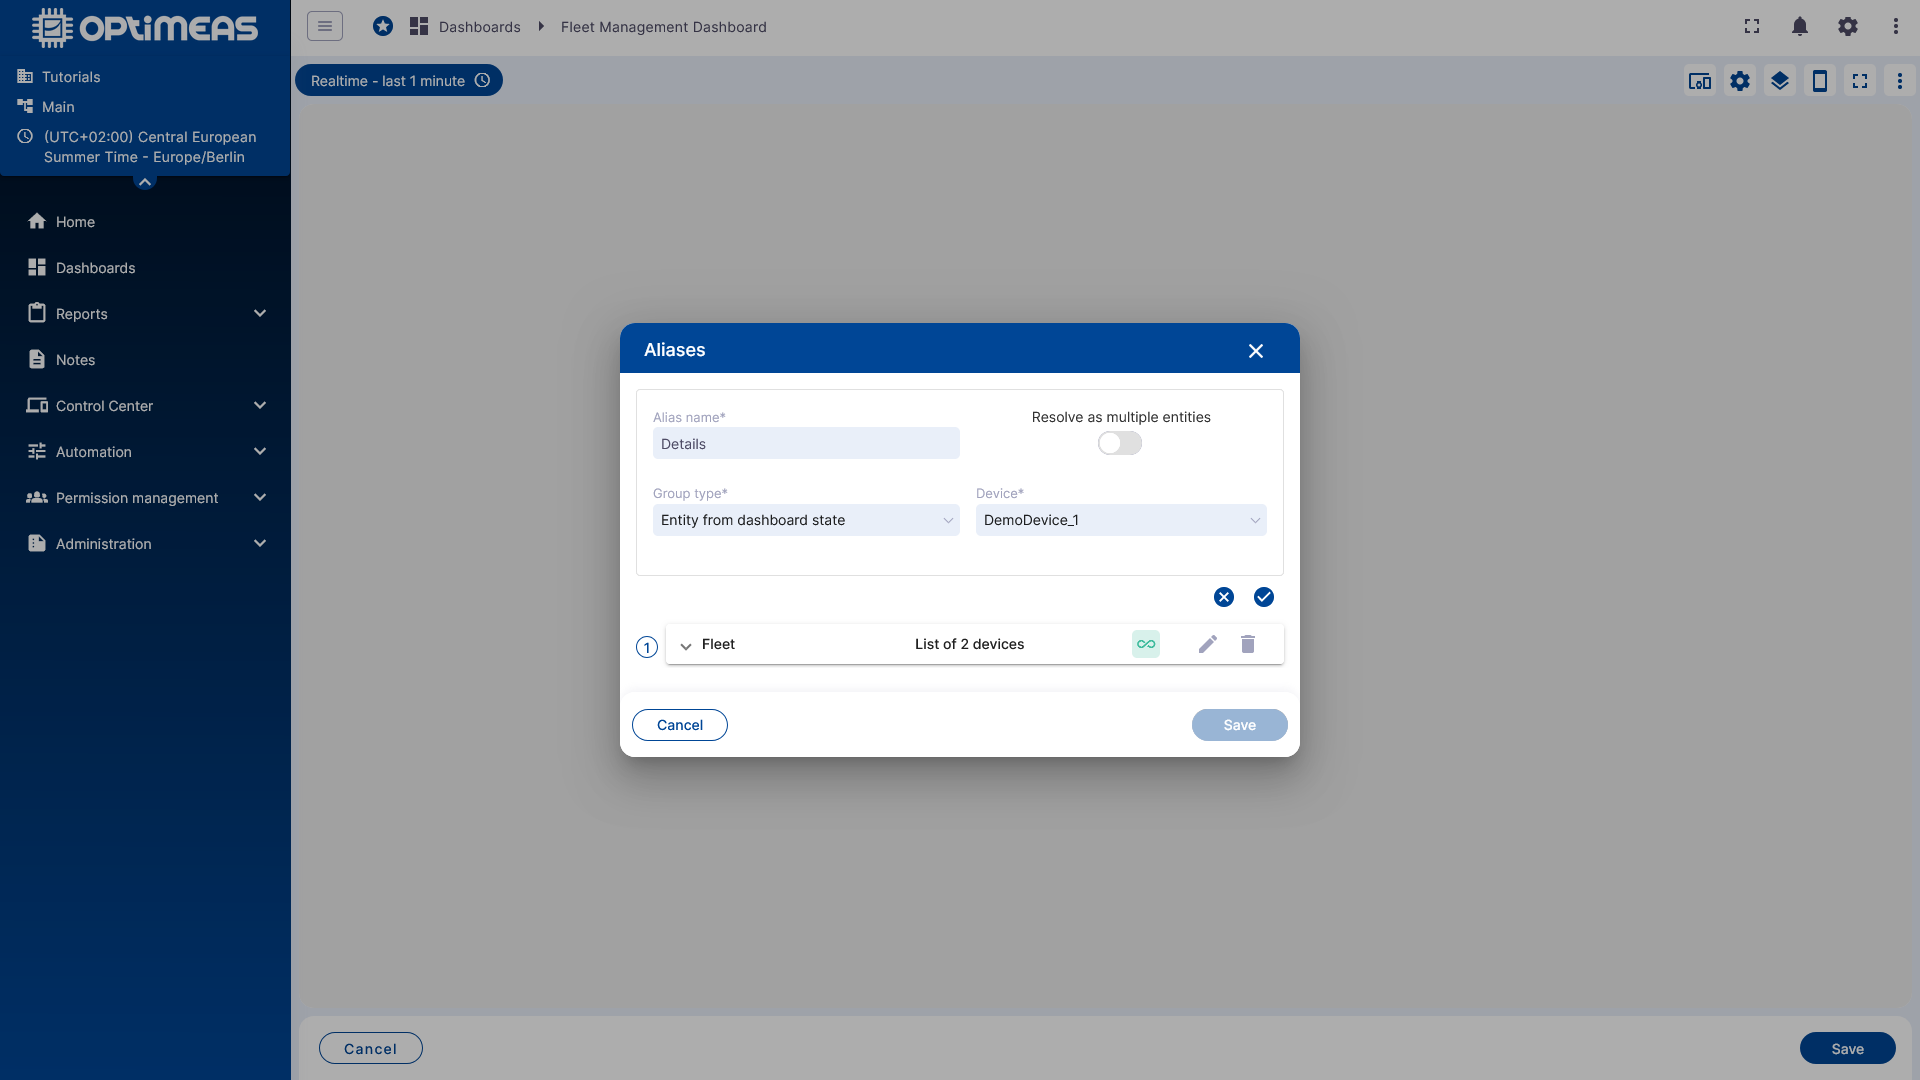
Important properties:
- Alias name: Details
- Group type: Entity from dashboard state
- fallback device in this example: DemoDevice_1
This alias always resolves the device that was passed through the dashboard state. This allows the same details state to be reused later for different devices.
Step 4: Create the Details State
To allow the dashboard to switch between overview and detail view, create a second state. In this example, it is named DetailsState.
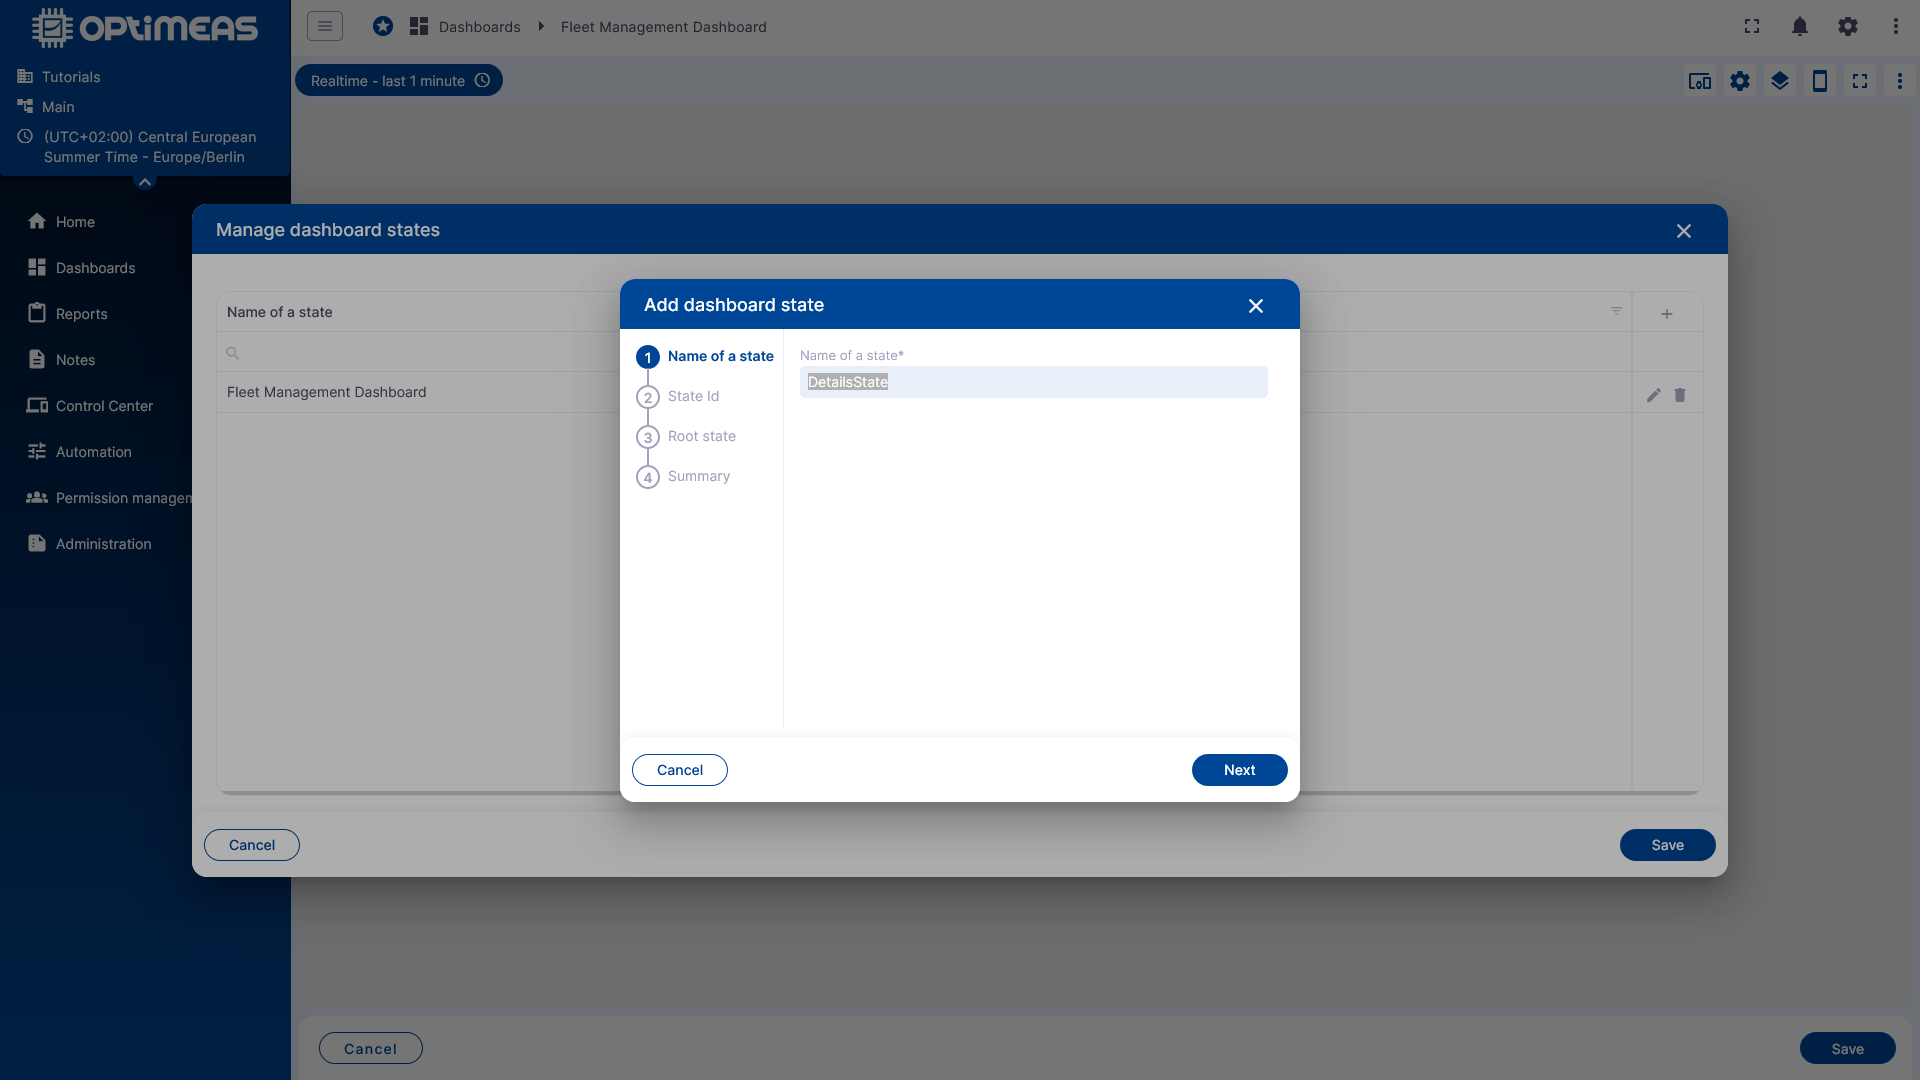
There are now two states:
- the root state as the start view
- DetailsState as the target for detail navigation
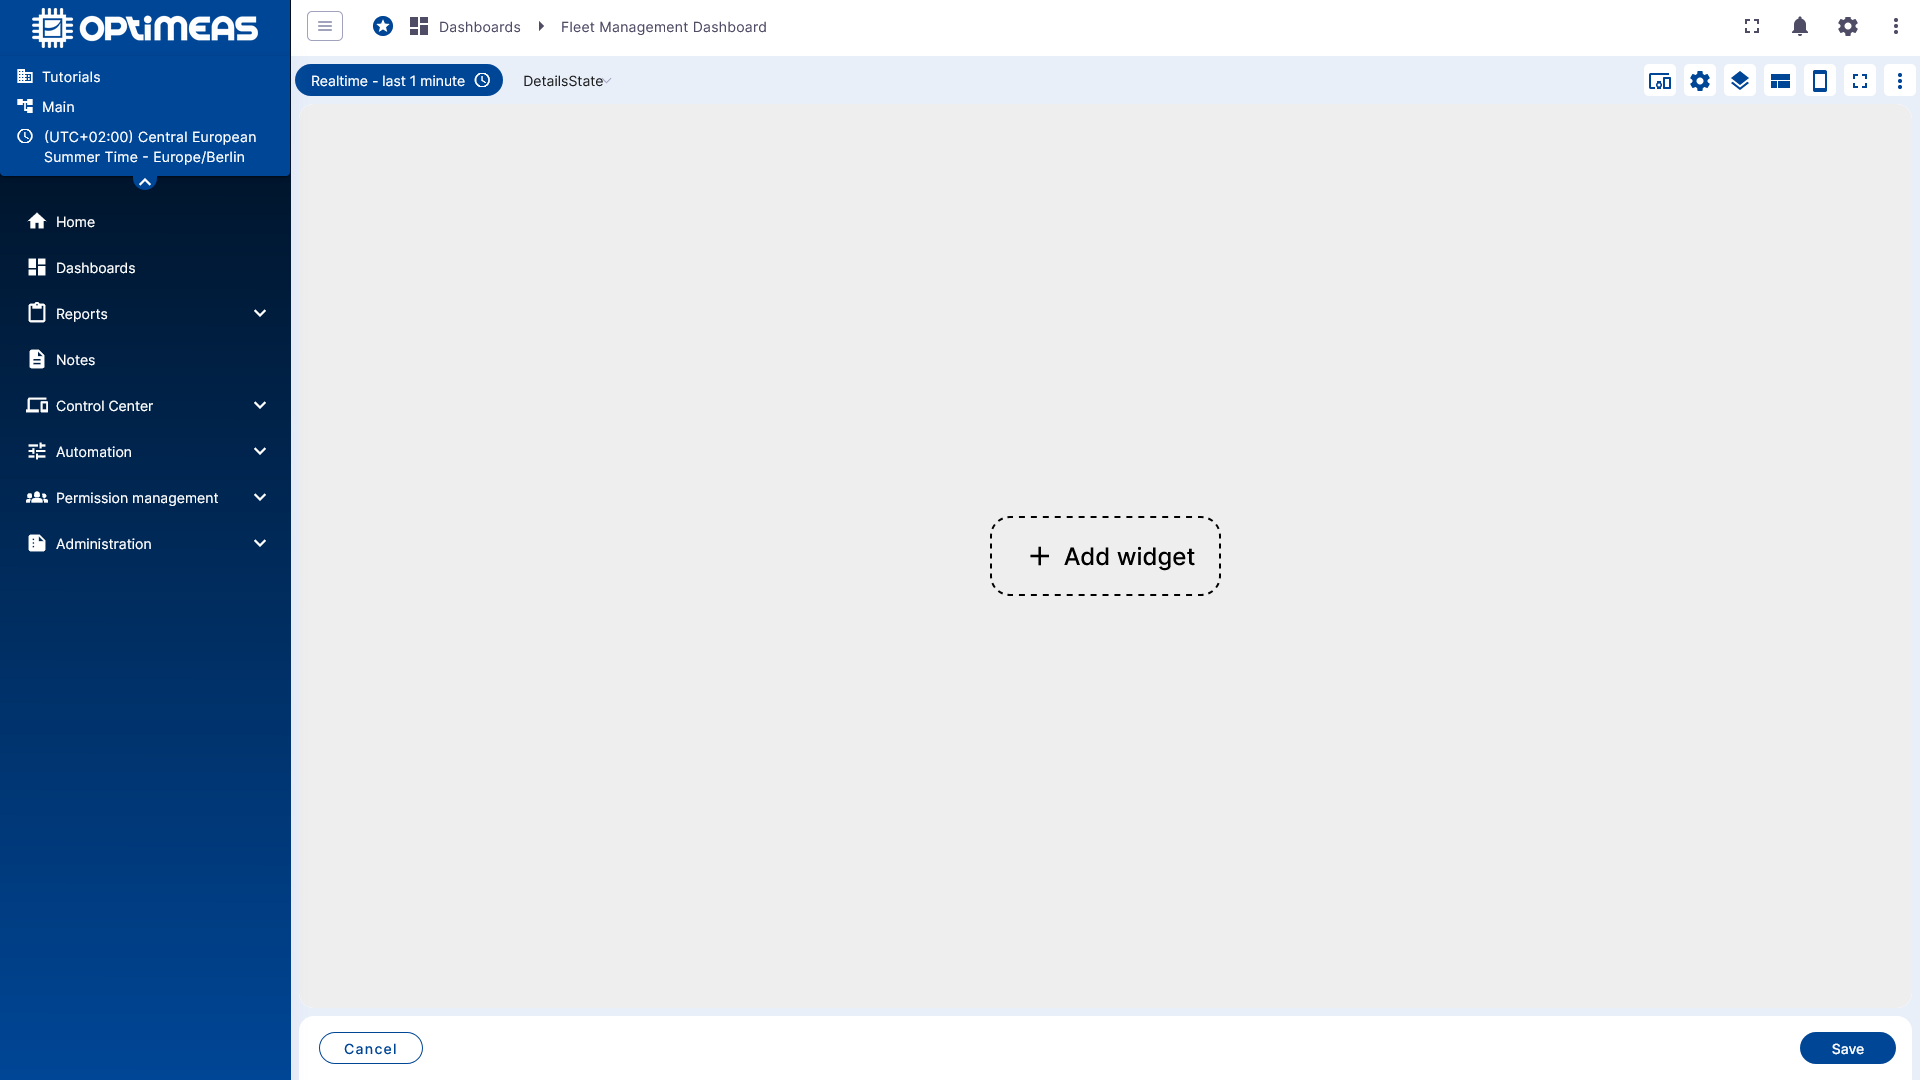
Using the state selector at the top left, next to the time-window selector, you can switch to the newly created details state. Immediately after creation, the details state is still empty.
Step 5: Add the Table in the Root State
Now add a table widget in the root state, in this example an Entities Table.
Use the alias Fleet as the data source.
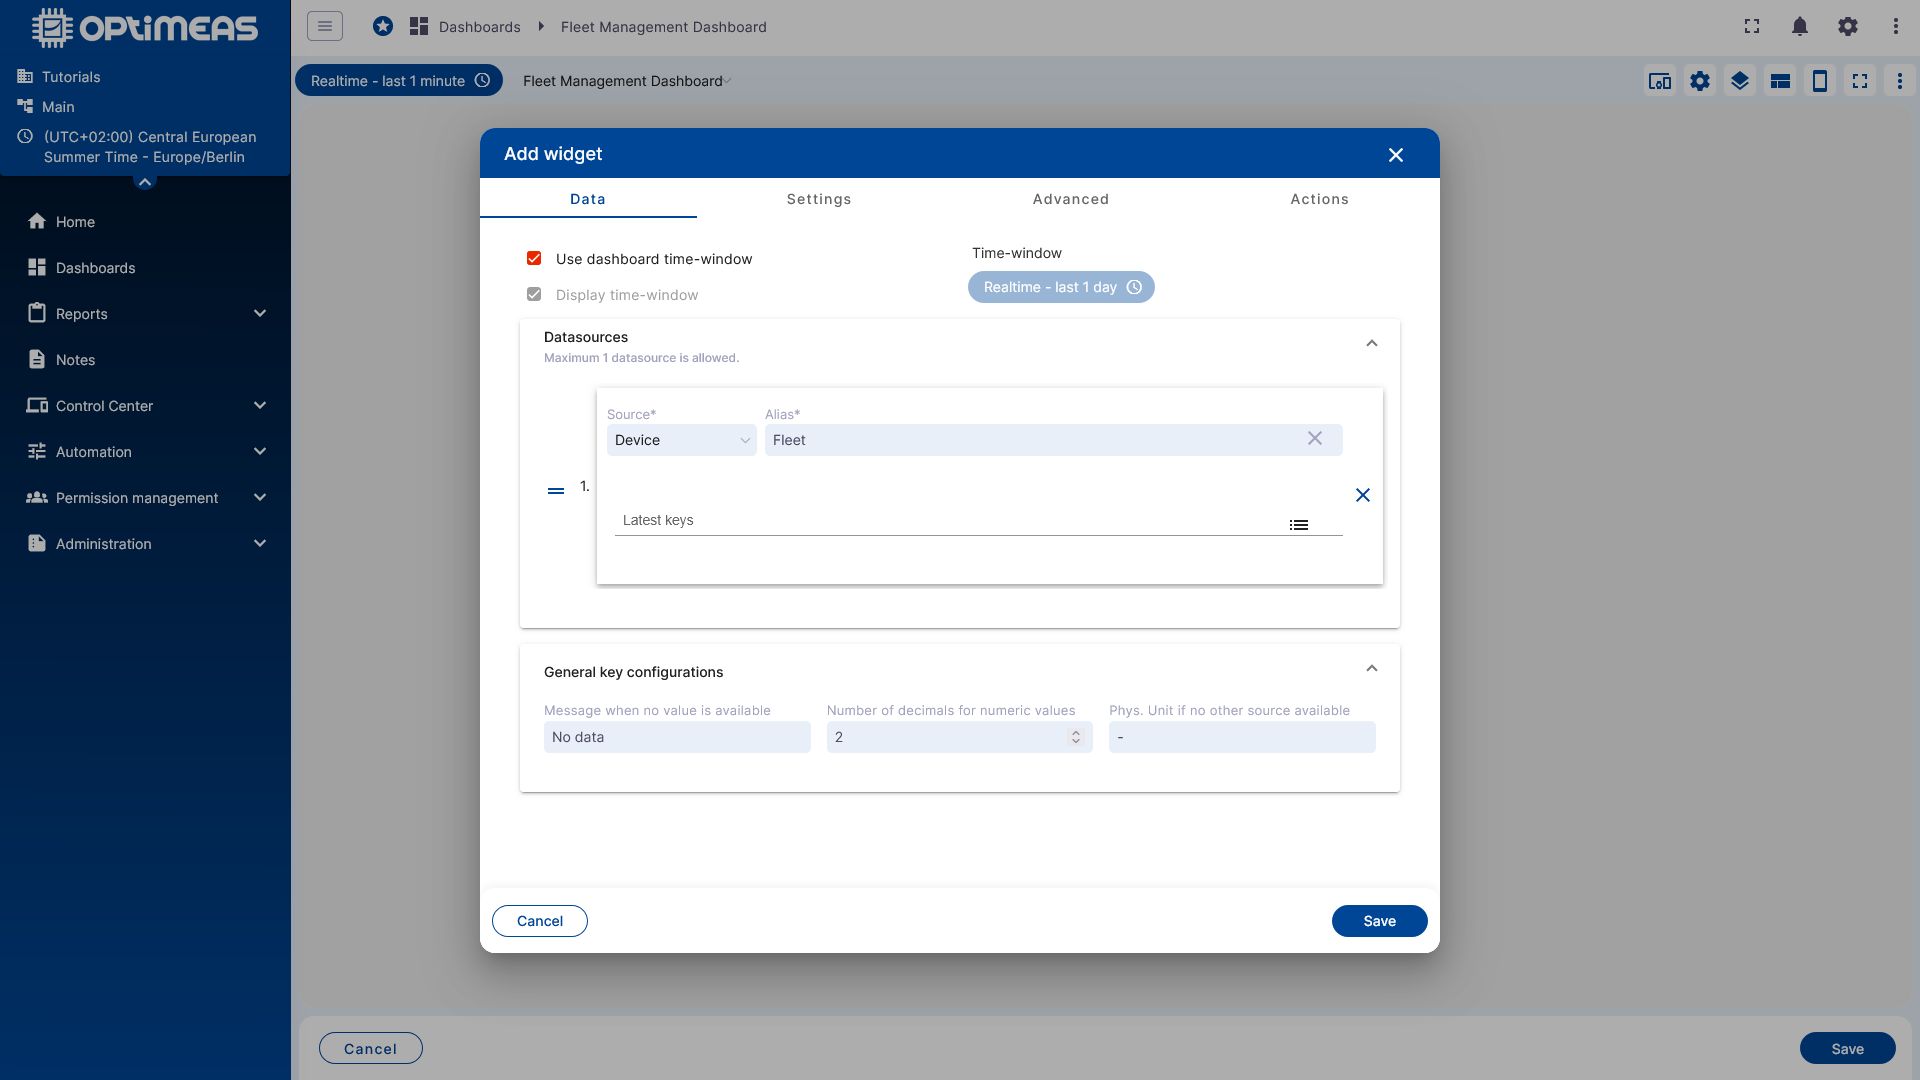
This causes the table to show all devices contained in the Fleet alias.
Step 6: Configure a Row Action for Navigation
To make a click on a table row switch to the detail view, add an action in the table widget under Actions.
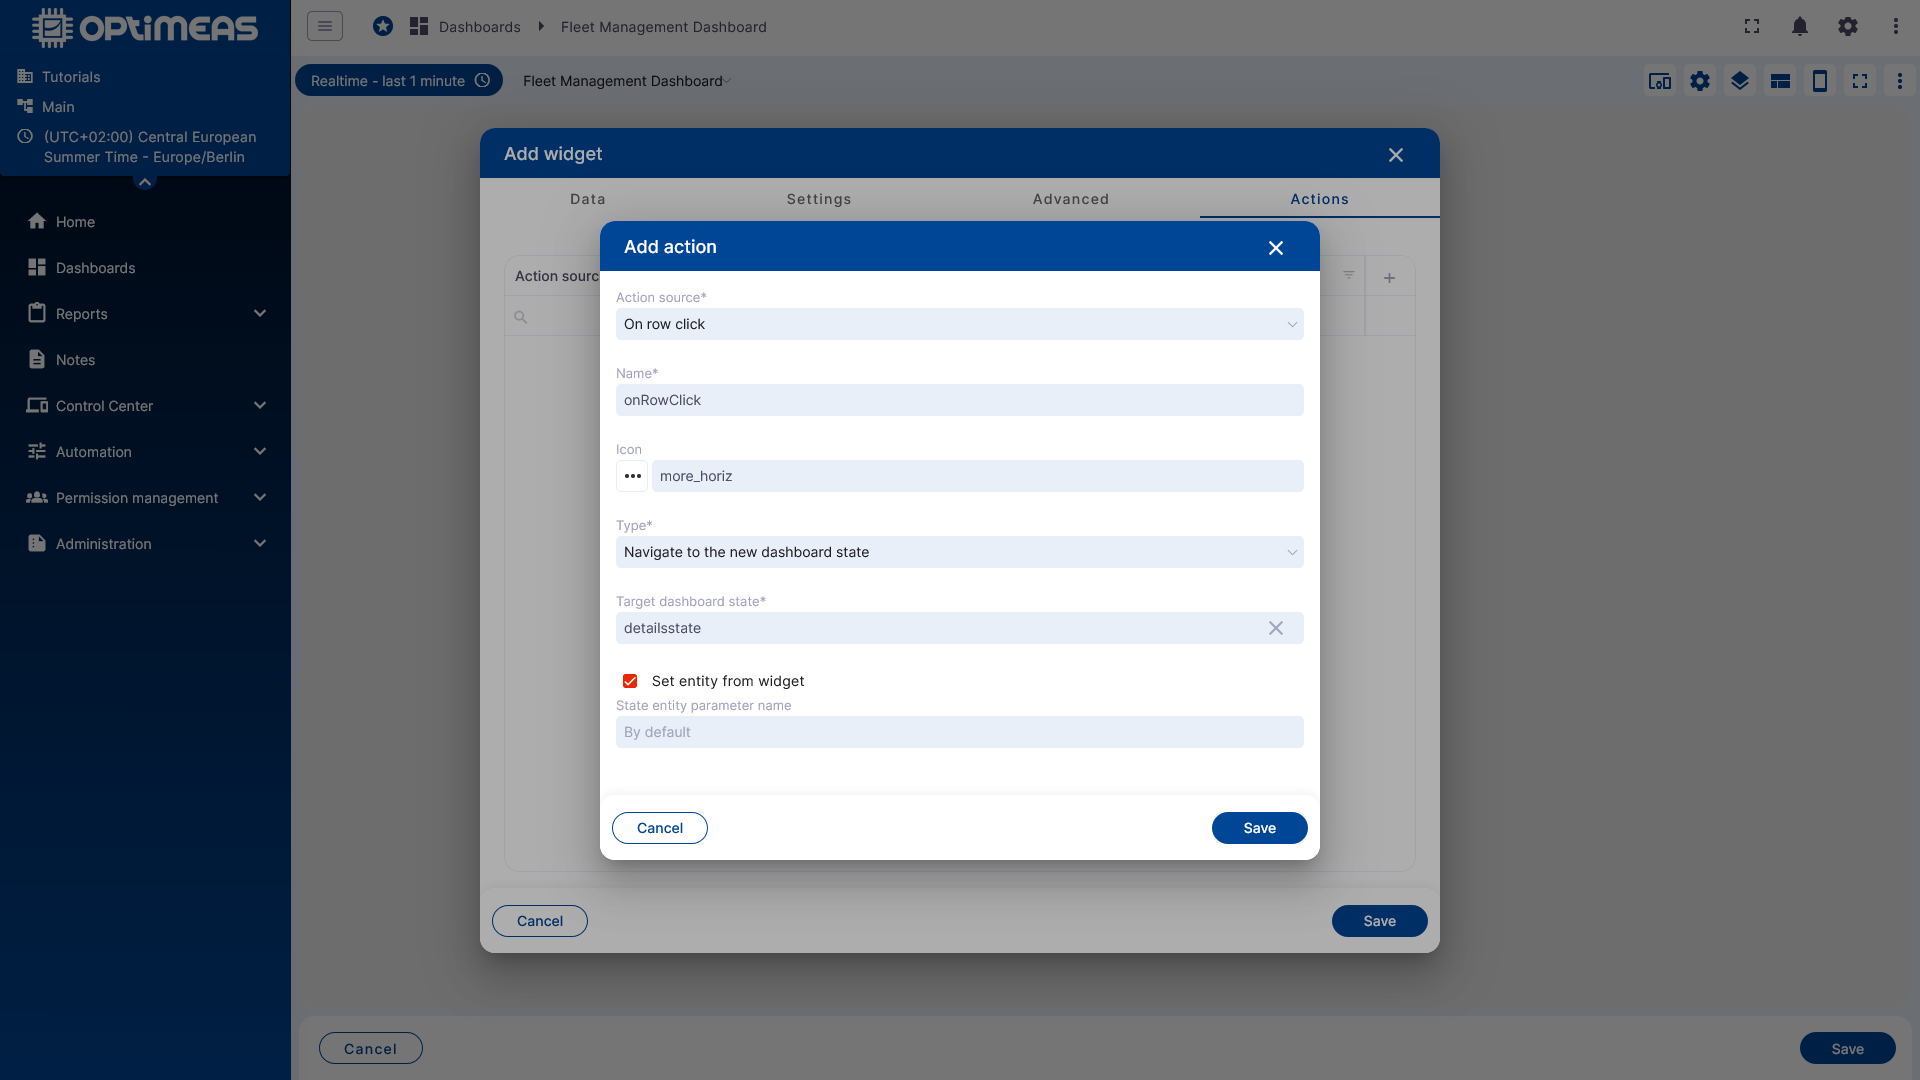
Configure the action as follows:
- Action source: On row click
- Type: Navigate to the new dashboard state
- Target dashboard state: detailsstate
- Set entity from widget remains enabled
The last point is the crucial part: the clicked device from the table row is passed to the target state. The alias Details can then resolve that device automatically.
Step 7: Add a Chart in the Details State
Now switch to DetailsState and add a chart widget there.
This time, use the alias Details as the data source instead of the Fleet alias.
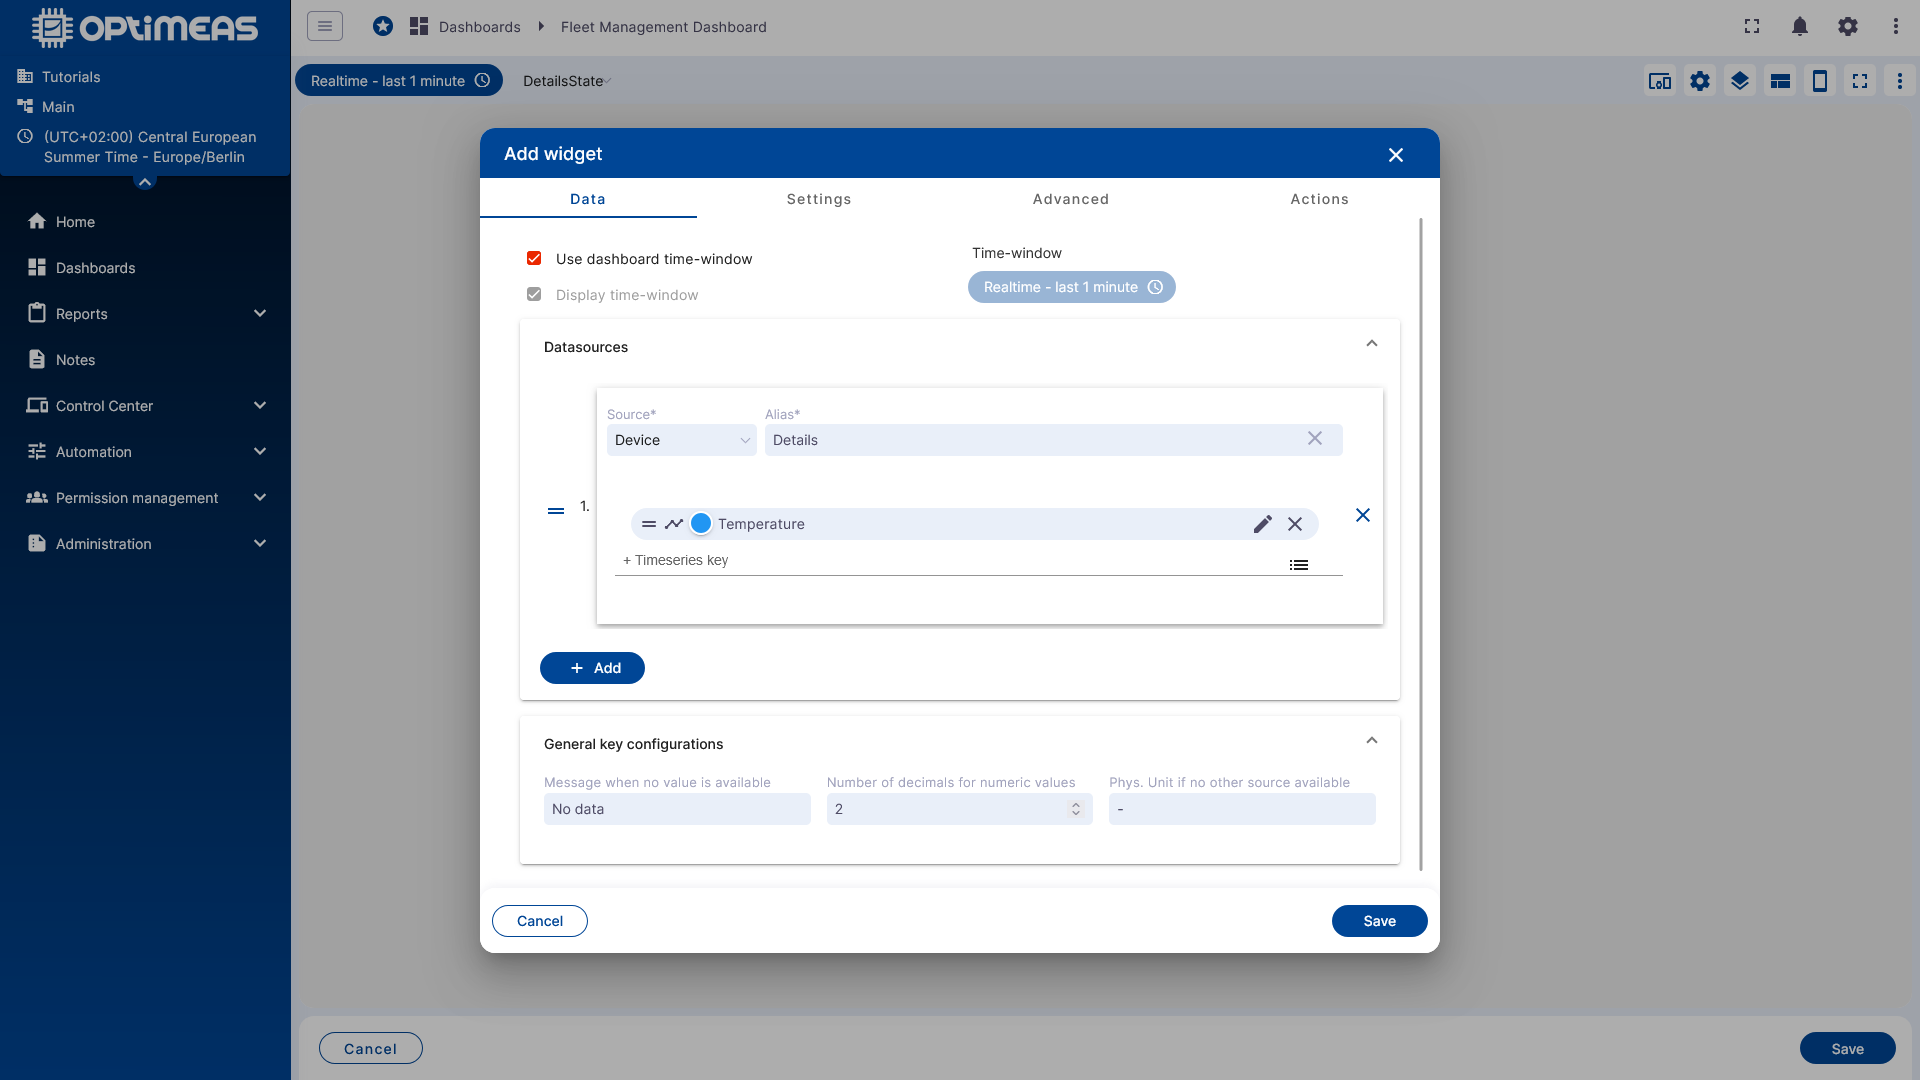
In this example, the Temperature channel is displayed.
Optional: Dynamic Label for the Legend
For a more readable chart, the data key can be adjusted.
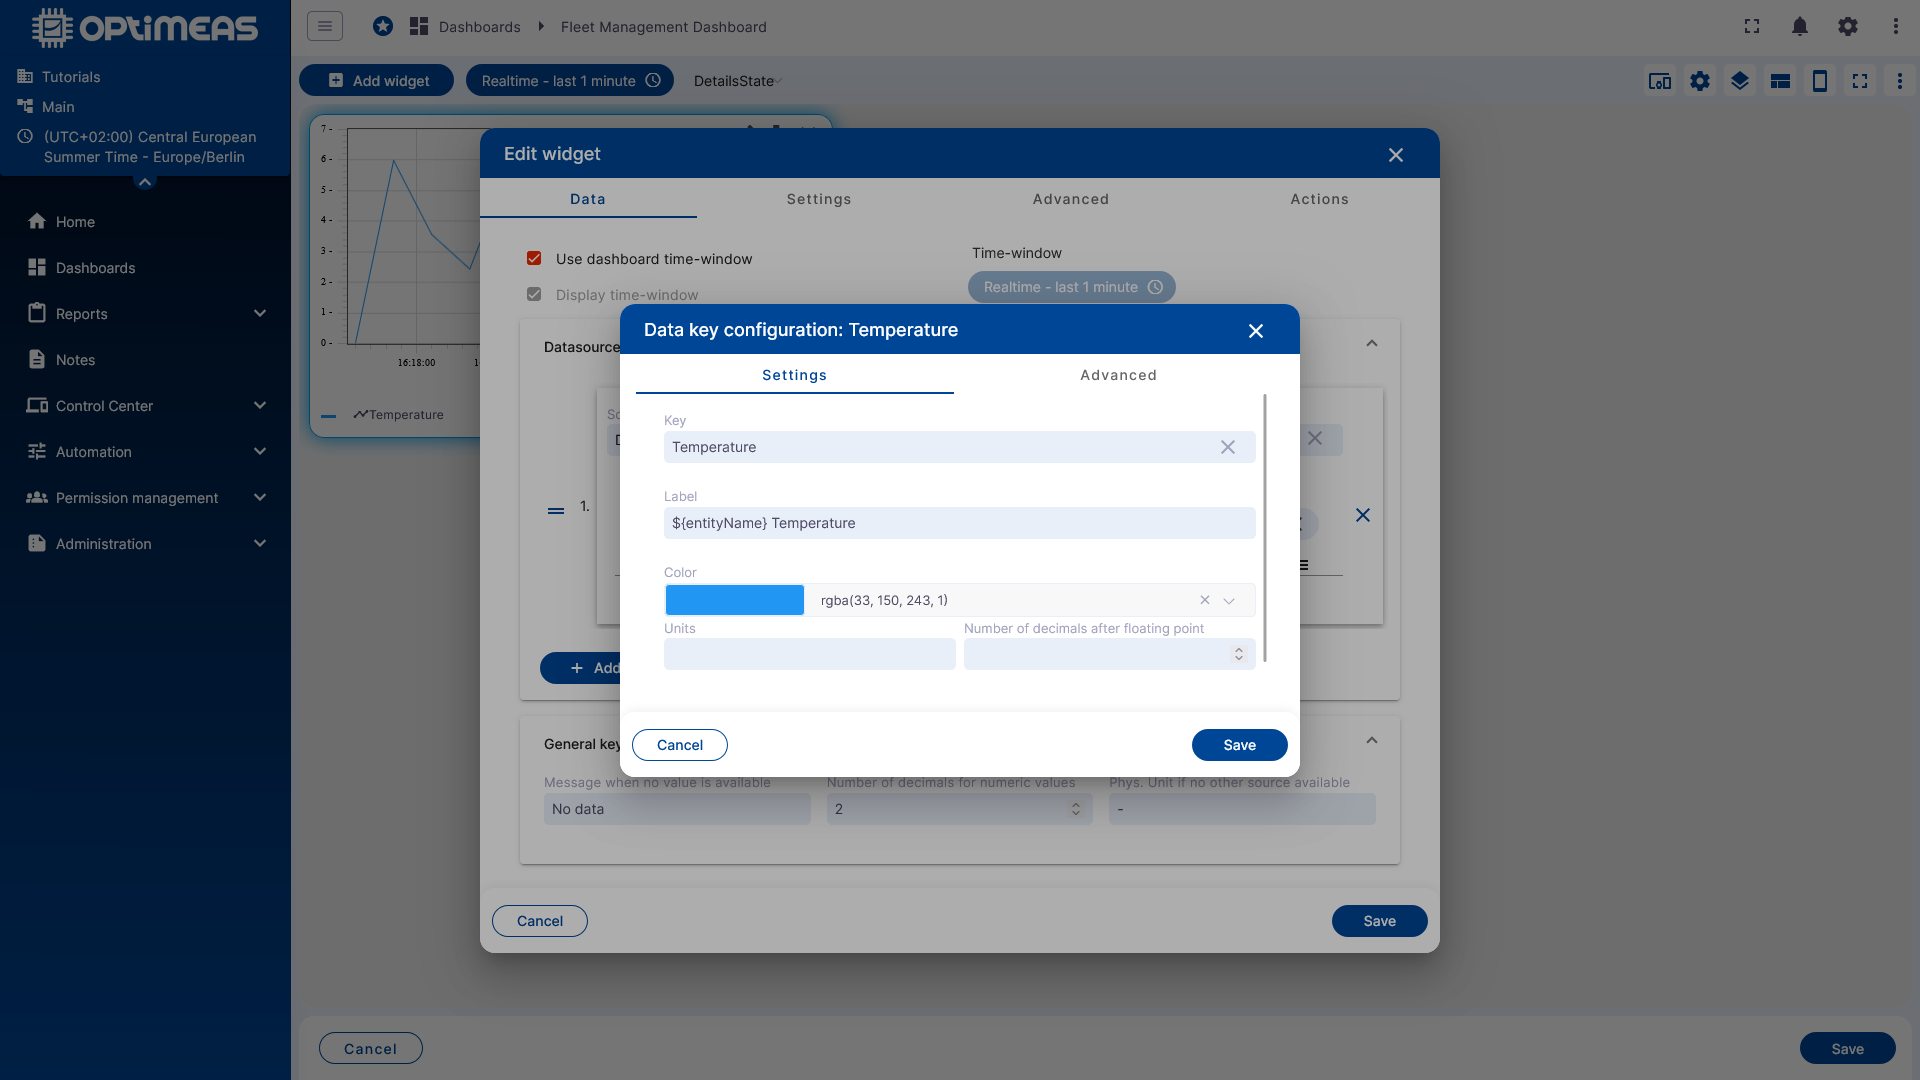
In this example, the label is set to:
${entityName} Temperature
This makes the chart legend show not only the channel name, but also the name of the currently selected device.
Step 8: Add a Home Button for Back Navigation
Additionally, add a button widget in the details state that returns to the overview.
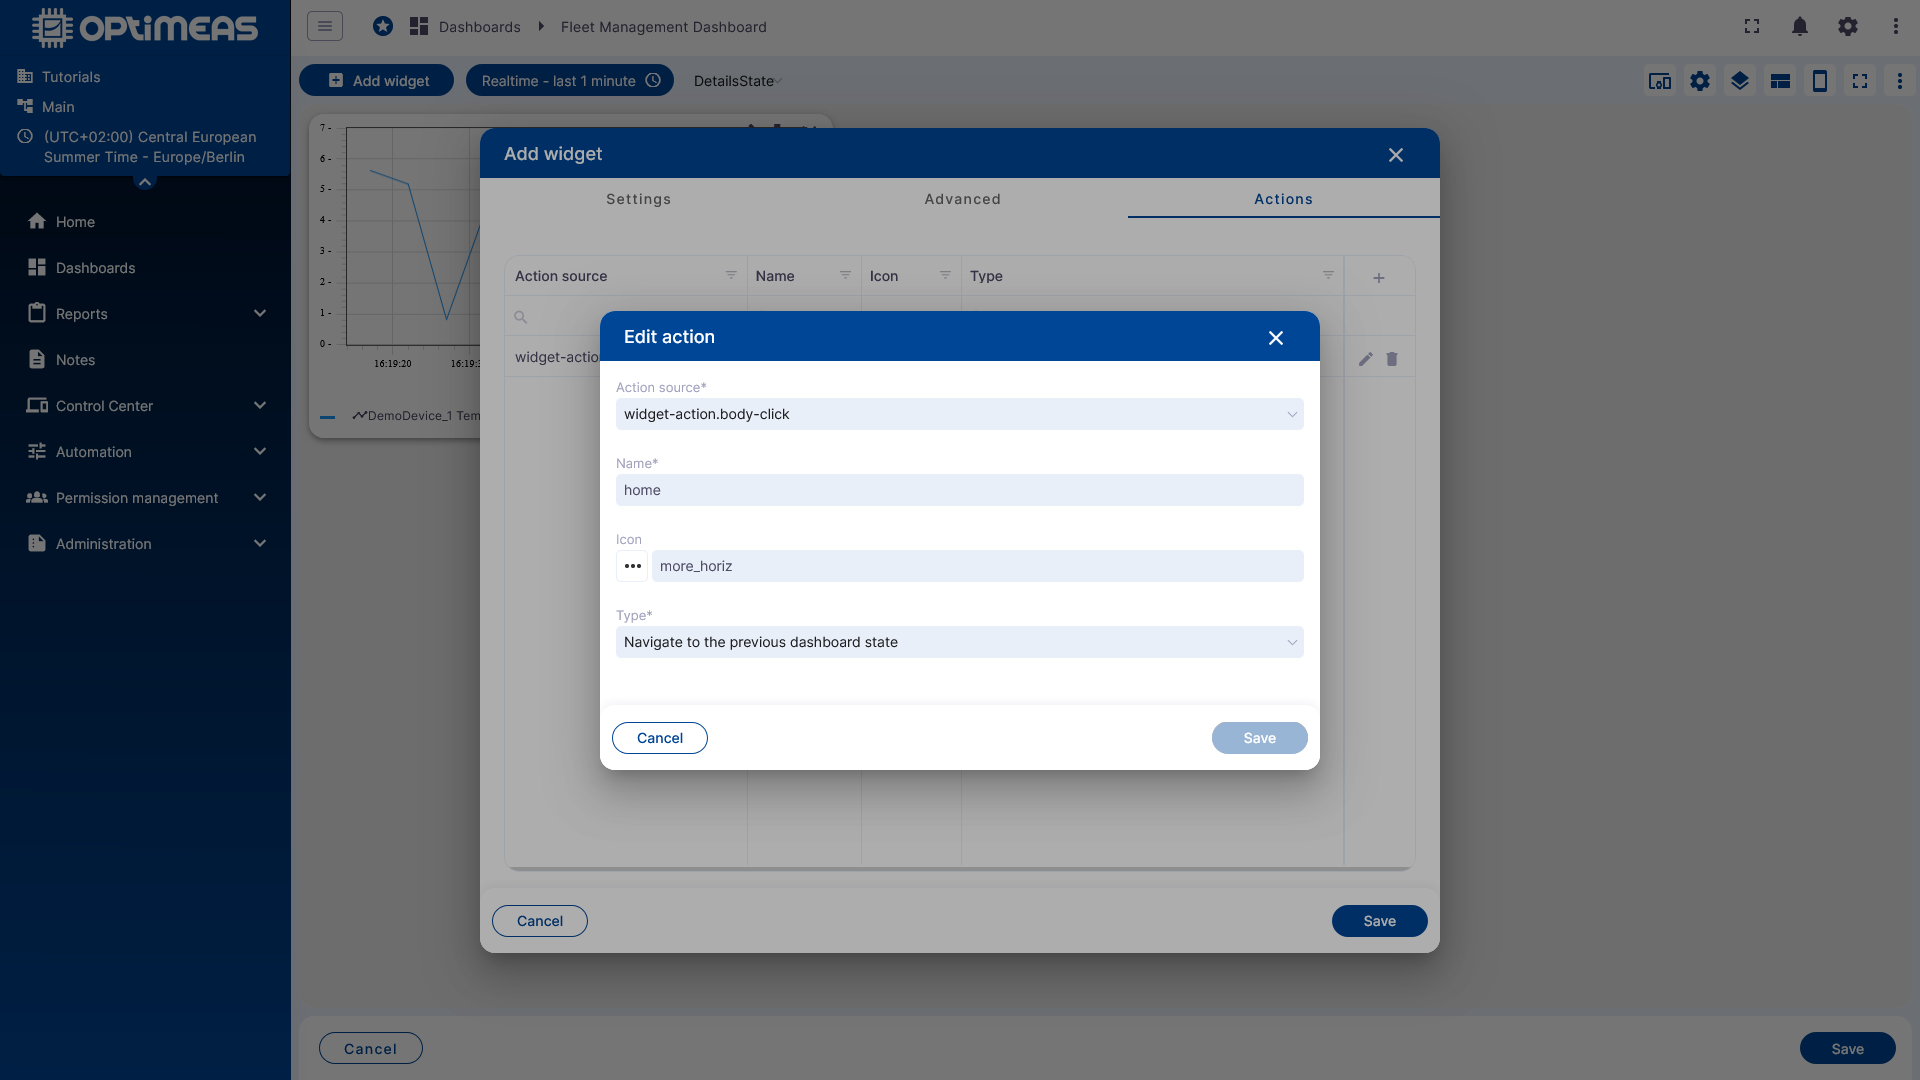
Set the action as follows:
- Action source: widget-action.body-click
- Type: Navigate to the previous dashboard state
This makes the dashboard jump back to the previously opened state when the button is clicked.
Result
After saving, the root state shows the device overview:
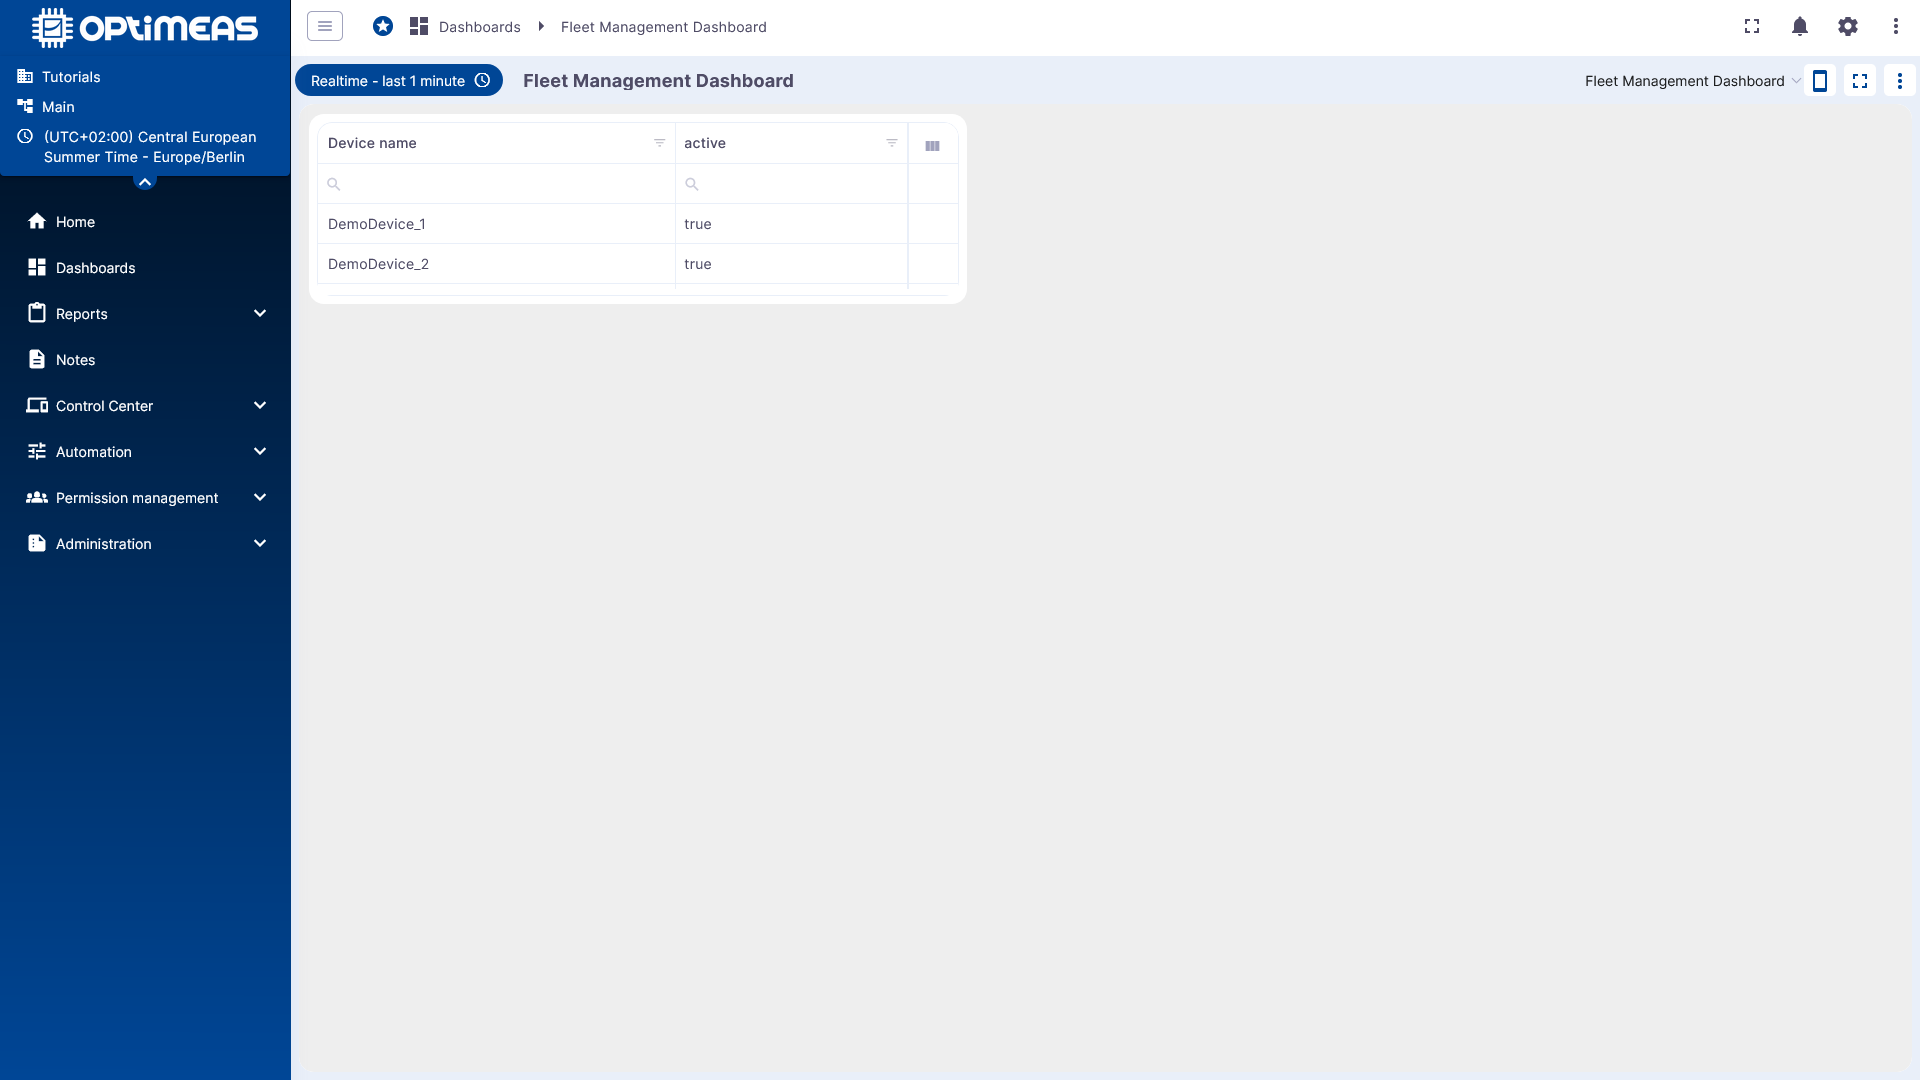
Clicking DemoDevice_1 opens the details state with the temperature trend of that device:
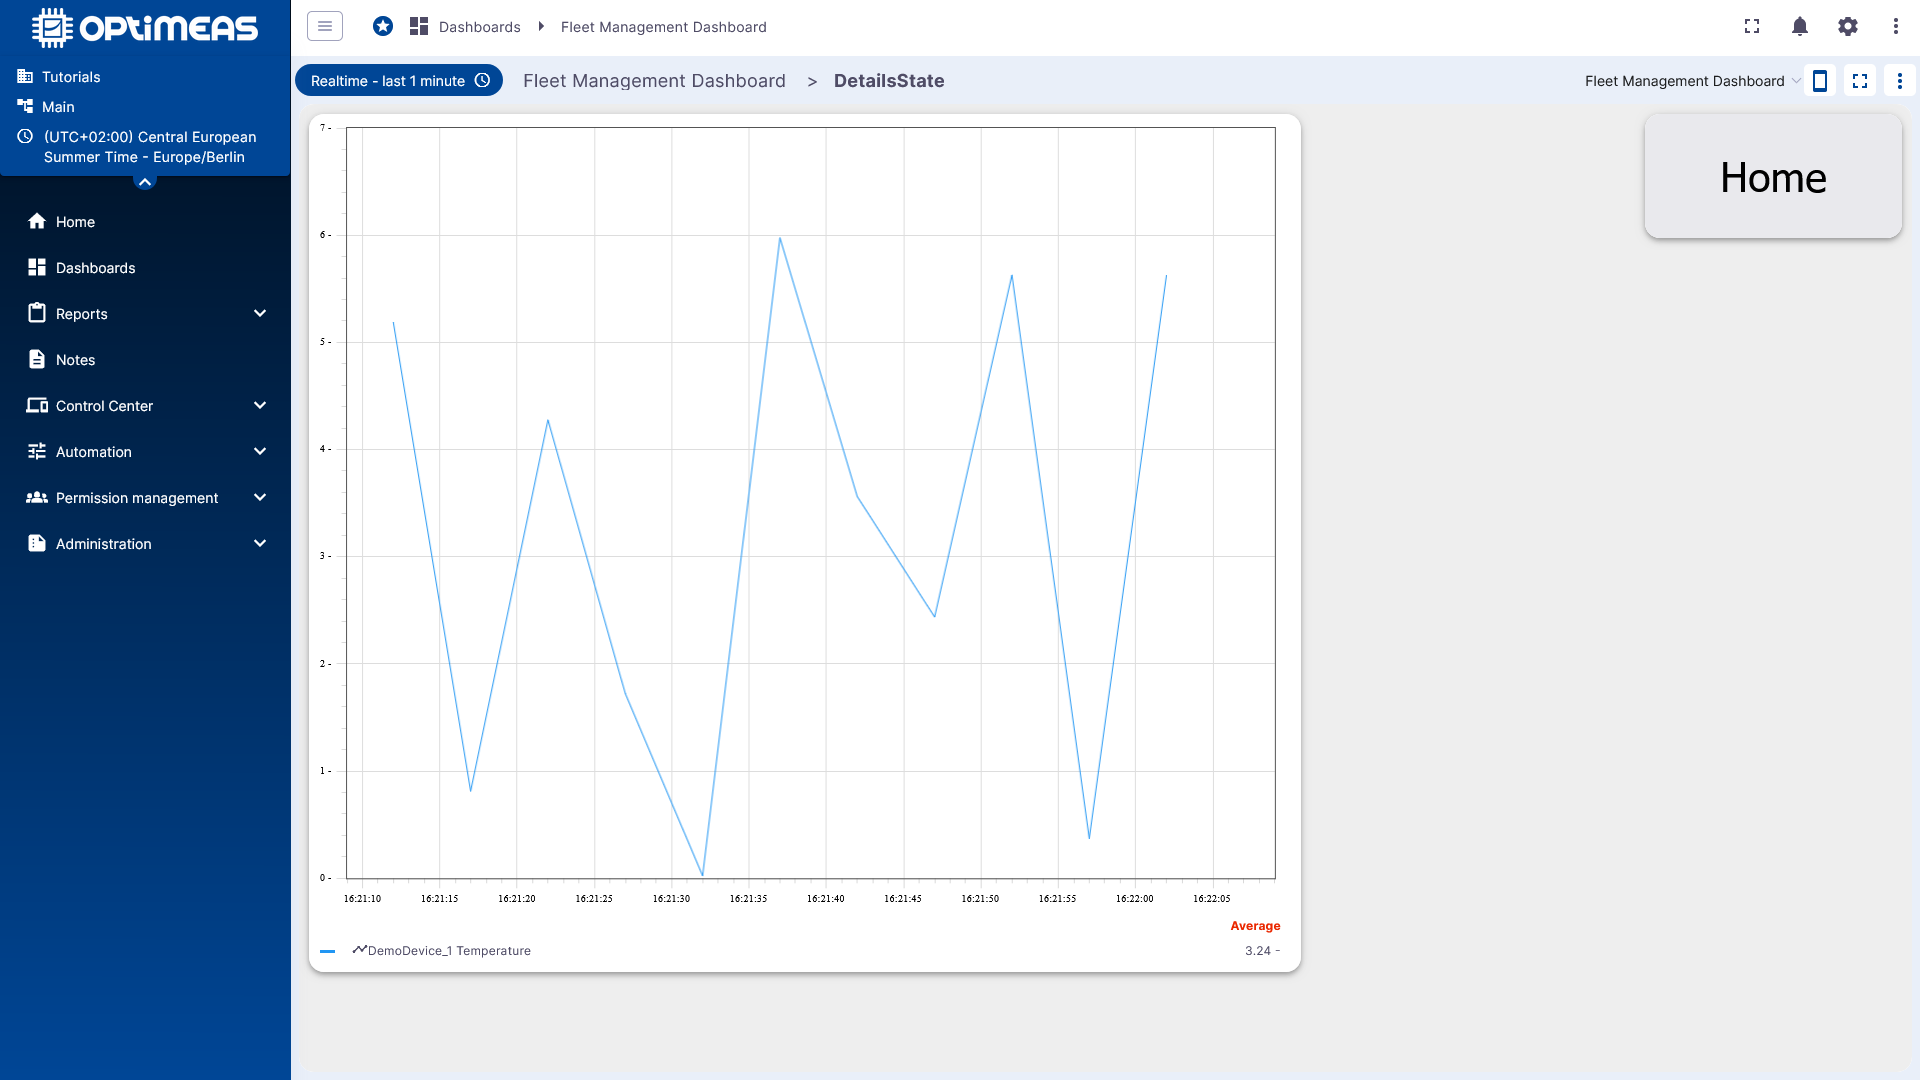
Clicking DemoDevice_2 opens the same details state again, but this time with the data of the second device:
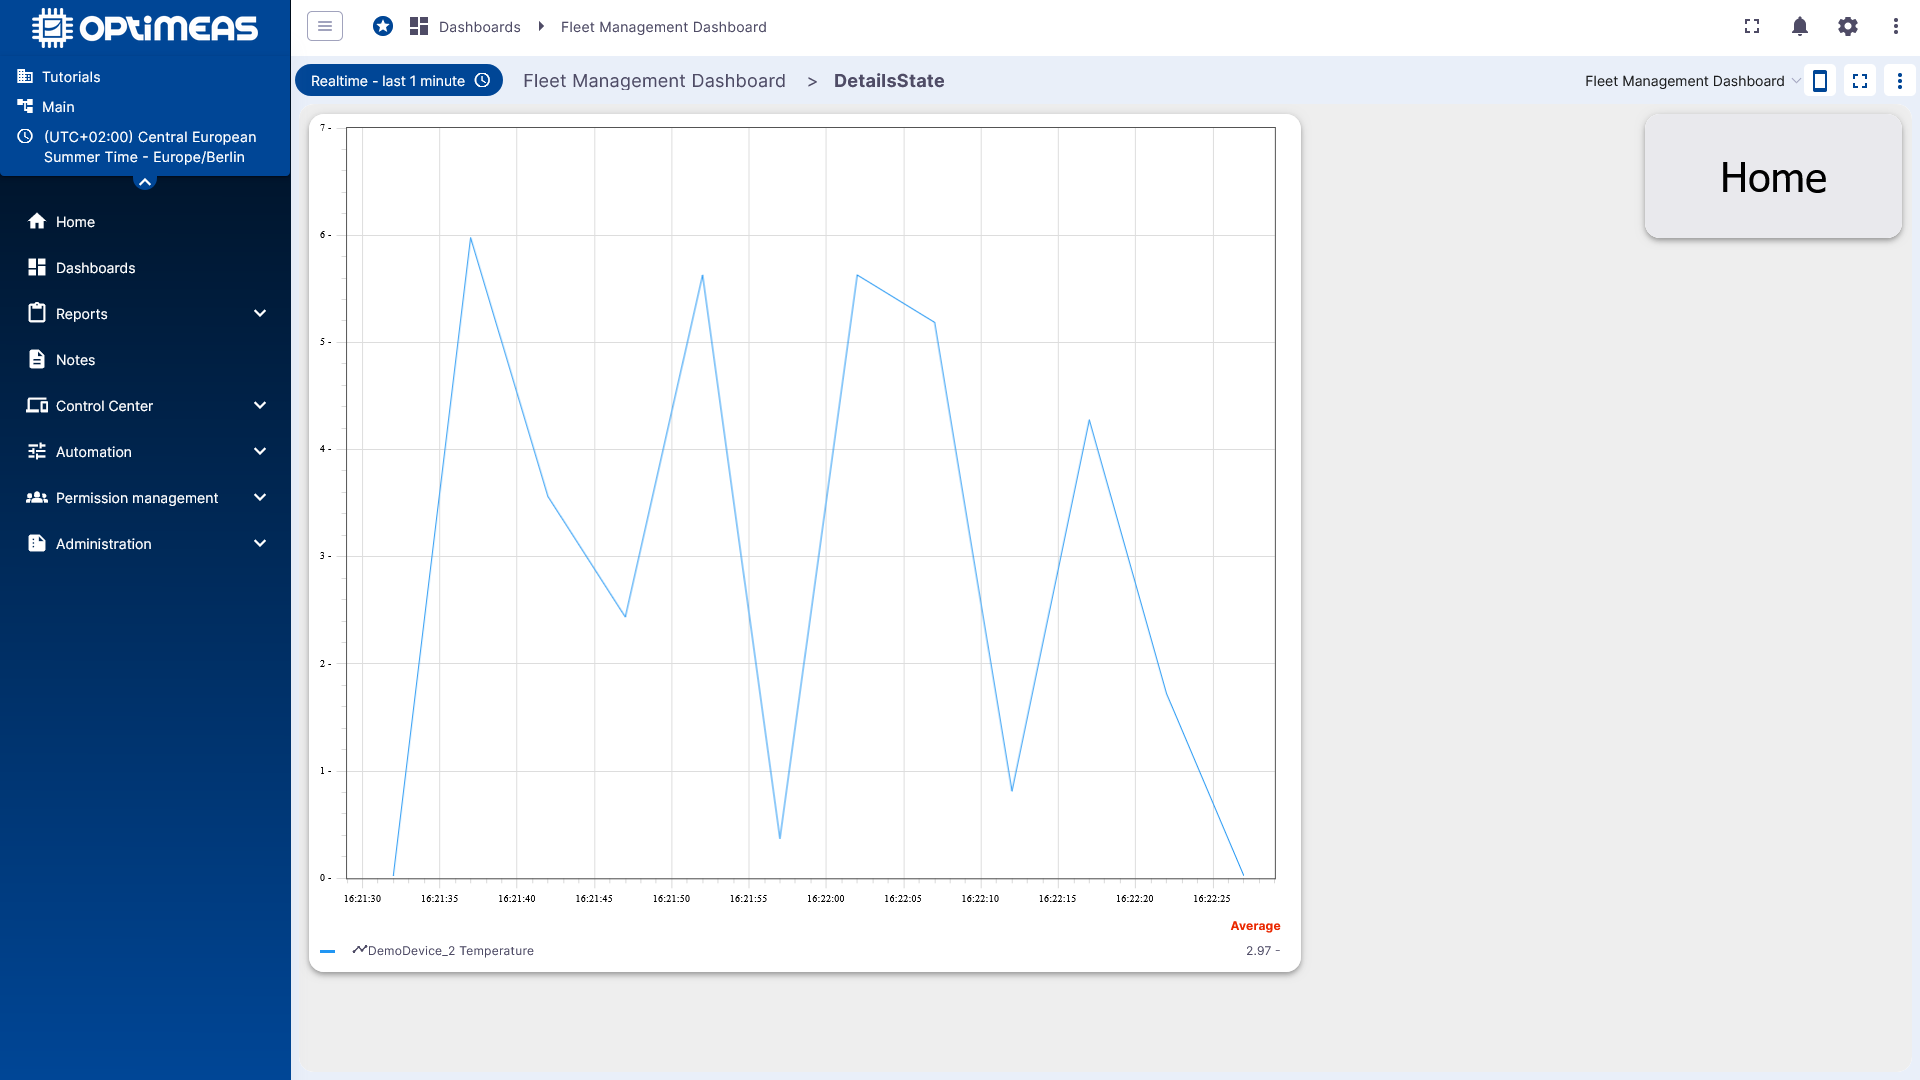
This confirms that:
- the same detail page is reused for multiple devices
- the selected device is correctly taken from the table
- back navigation via the home button works
Back to the example overview: