Flashing the TX93 module
The UUU tool from NXP is used to flash the TX93 module. We provide a version for Microsoft Windows in our firmware archives. There is also a version for Linux: https://github.com/nxp-imx/mfgtools
For diagnostic purposes, it is also useful to connect the “UART debug port” as described here.
When the power is off, the two jumpers are plugged in as shown in the following image:
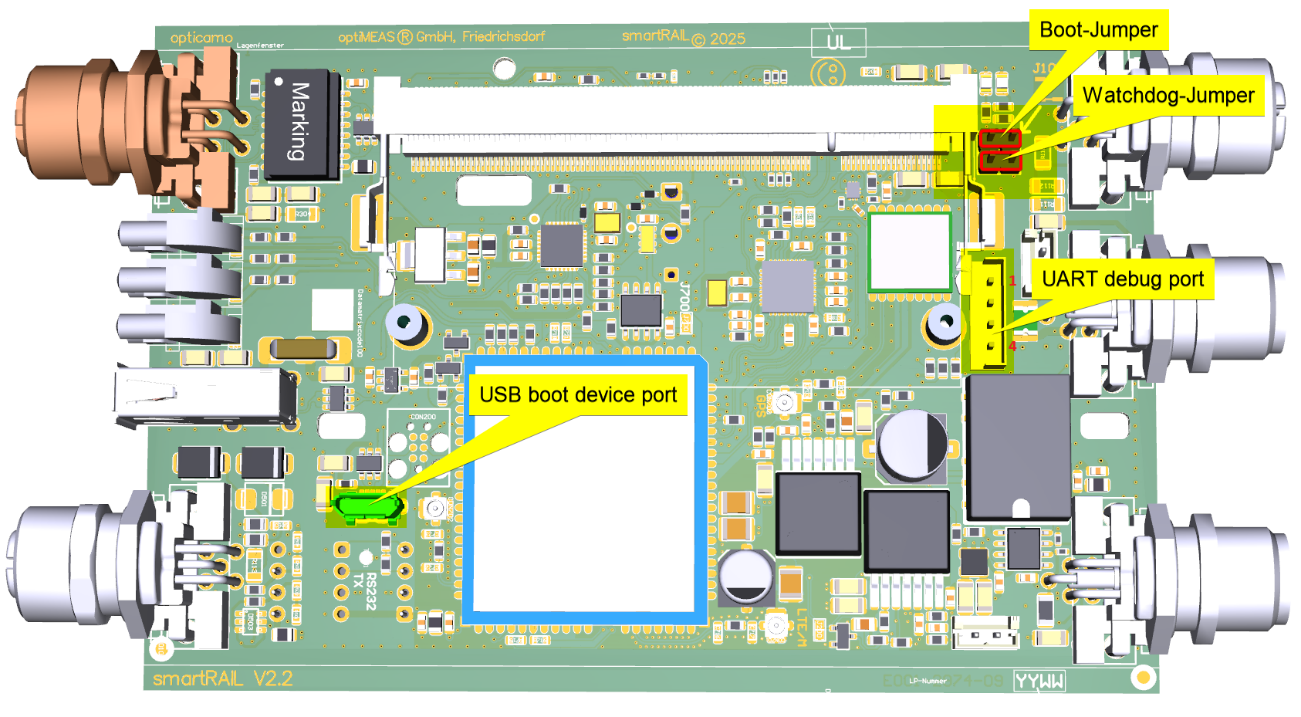
Meaning of the jumpers
The watchdog jumper prevents the power controller from regularly switching the board off and on again when the watchdog fails. The boot jumper ensures that the CPU boots via the "USB boot device port."
Flash process
The board must not be powered backwards via USB. This means that the board must not be connected via USB as long as the board is not powered! In other words: the board may only be connected to a computer via USB as long as the board is also powered with 24V.
- Insert the jumper
- Supply the board with power
- Connect the USB boot device port to the computer
- Start
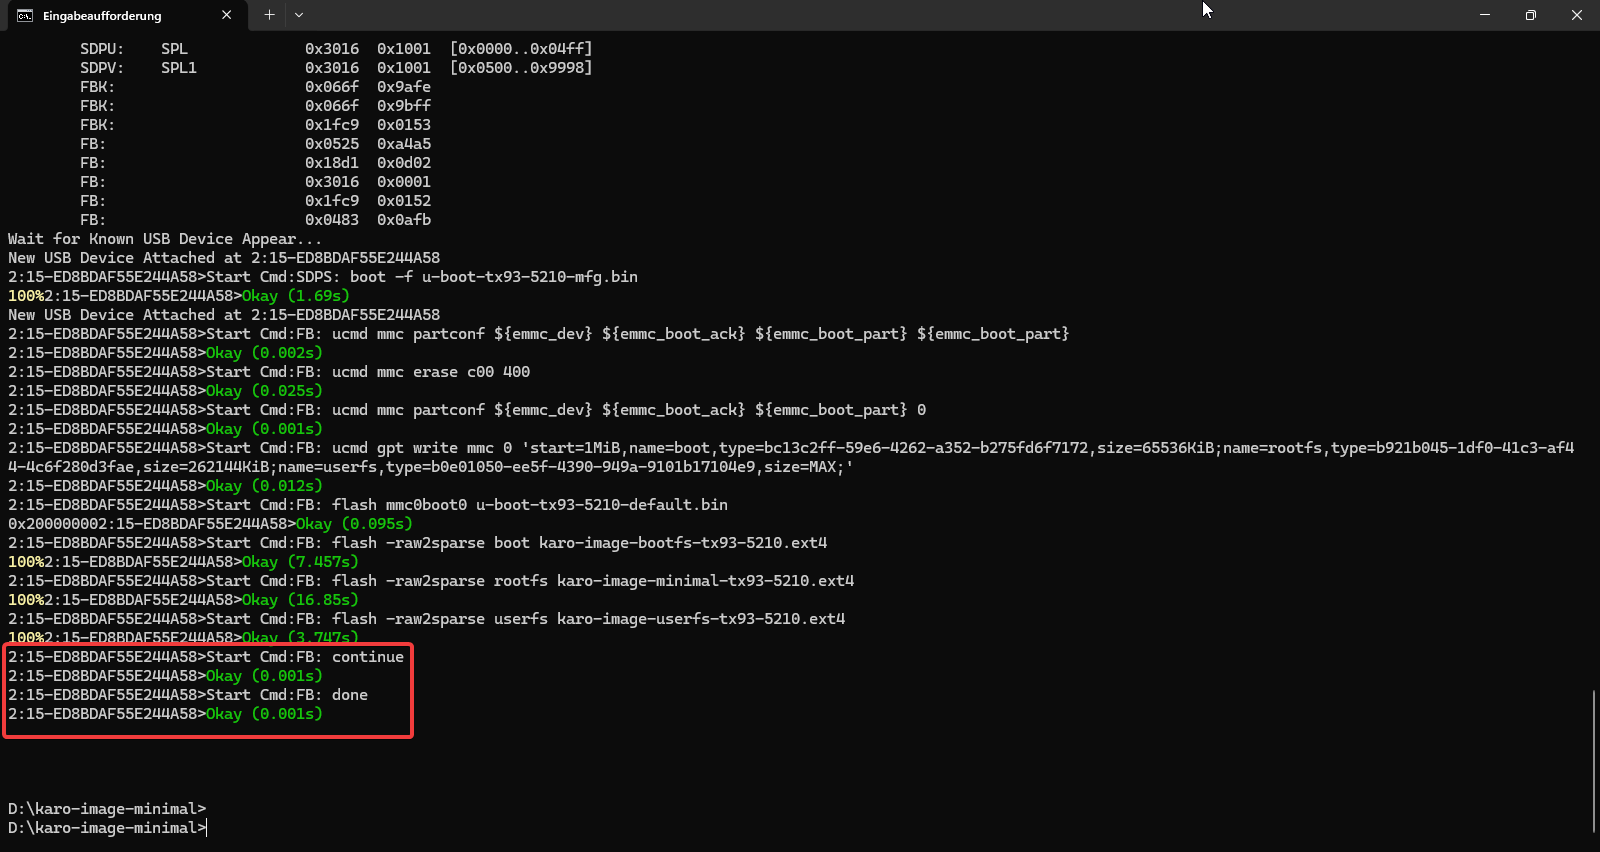
uuu -vin a command prompt in the firmware directory
The flash process is complete when the FB: done command has successfully run with Okay.
- Disconnect USB boot device port from the computer
- Switch off the power supply
- Remove jumper
The first flash attempt will fail because a driver must first be installed manually, as described in the next chapter.
Driver installation
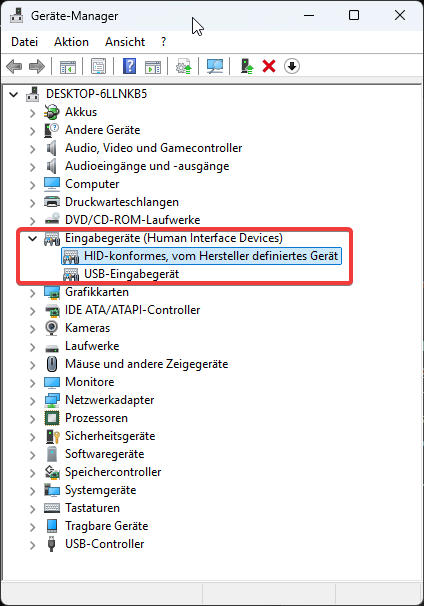
After switching on, the TX93 is recognized as a USB HID device:
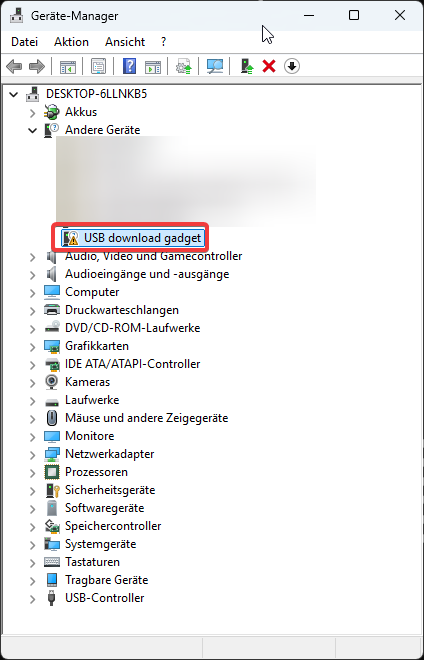
In the first step, the UUU tool loads a U-Boot binary that implements the USB Fastboot protocol.
For this USB Fastboot device, which is displayed as a USB download gadget, a driver must first be installed under Windows:
It is best to cancel the flash process with CTRL+C in the command prompt before installing the driver!
With the Zadig Tool ( https://zadig.akeo.ie/ ), you can view the driver that is displayed for the USB download gadget device. To be on the safe side, you should pay attention not only to the name but also to the matching USB IDs (1FC9 0152):
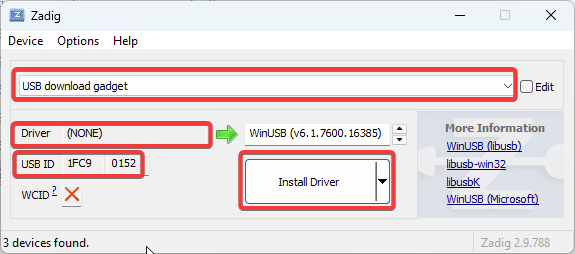
If the driver is not yet installed, Driver (NONE) will be displayed here.
Then the WinUSB (v6.xxx) driver must be selected and installed by clicking on "Install Driver".
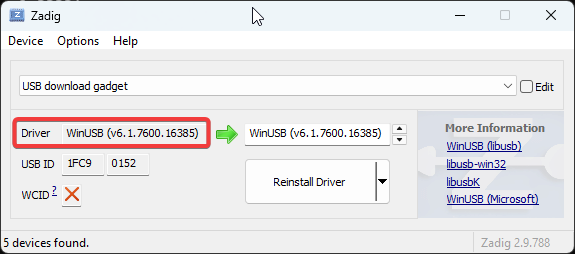
When set up correctly, it will look like this:
Afterwards, it is best to disconnect the USB cable and turn off the board to enter a defined state.
Only then should another flash attempt be made.