OCEAN in a VMware Workstation VM
This guide was tested with VMware Workstation Pro version 16.2.5 build-20904516.
To create the VM, the hard disk image (VMDK) must first be downloaded: yocto-virtualbox
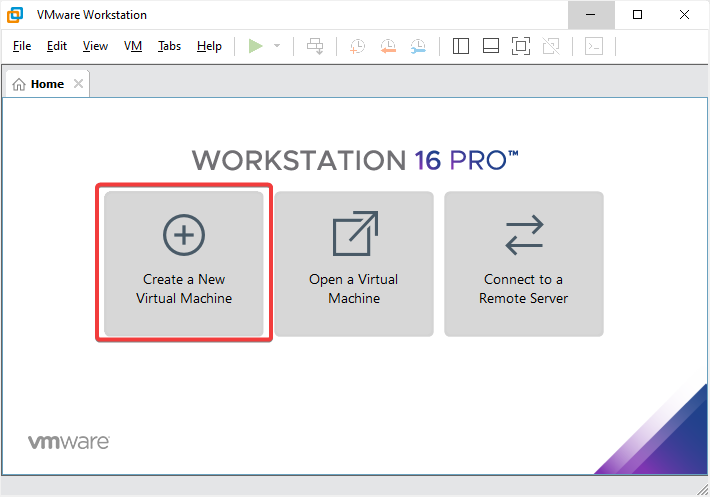
A new virtual machine is created in the VMware Workstation via "Create a New Virtual Machine":
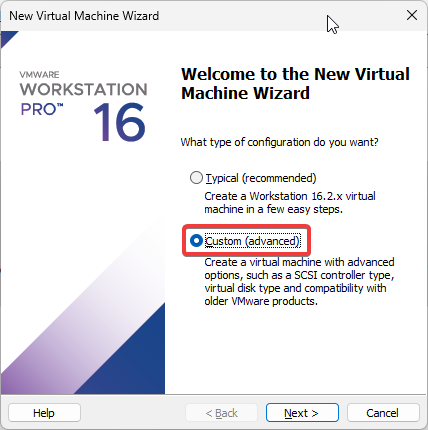
Custom (advanced)" is selected as the type:
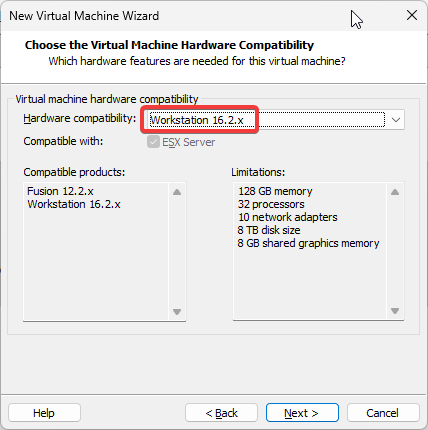
Version "16.2.x" is selected for hardware compatibility:
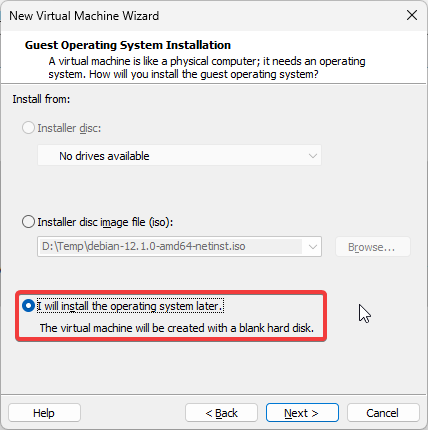
We do not use installation media with "I will install the operating system later.":
We select "Linux" and "Other Linux 5.x kernel 64-bit" as the operating system:

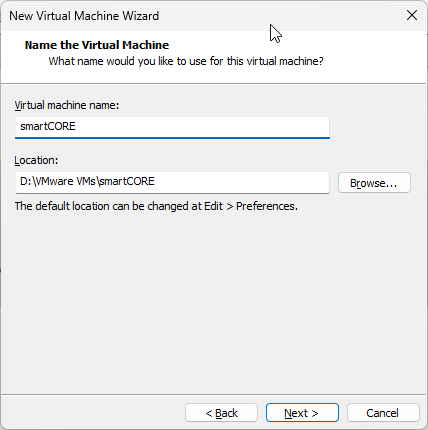
A name of your choice is then specified:
There are no mandatory specifications for the number of processors / cores:

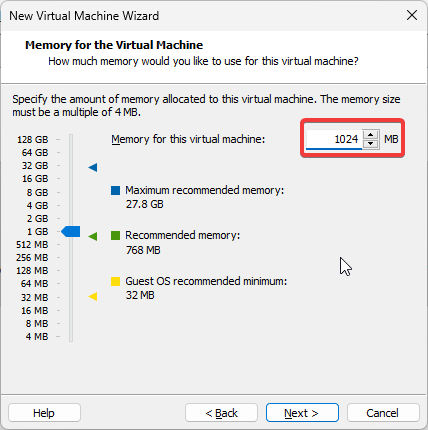
RAM should be at least 512 MB:
Use bridged networking" is selected for the network type:

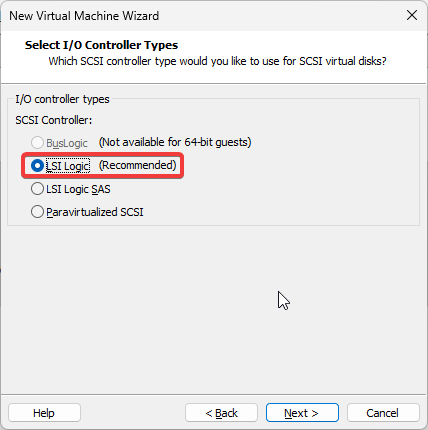
LSI Logic (Recommended)" is selected for the SCSI controller:
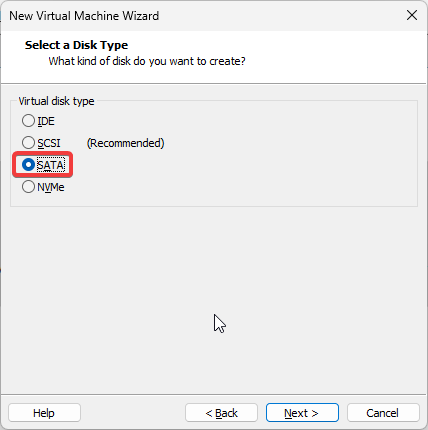
We select "SATA" for the disk type:
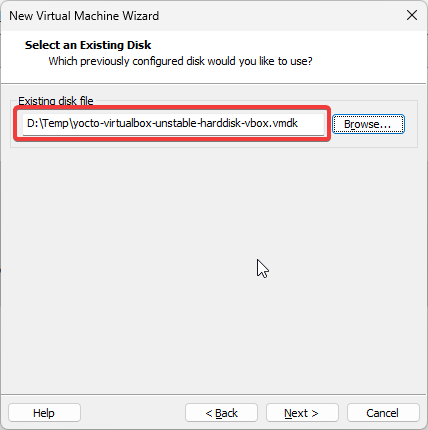
For the hard disk itself, we select "Use an existing virtual disk":

The downloaded VMDK file is then selected:
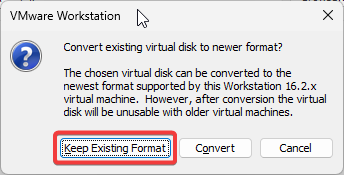
For the question regarding format conversion, we select "Keep Existing Format":
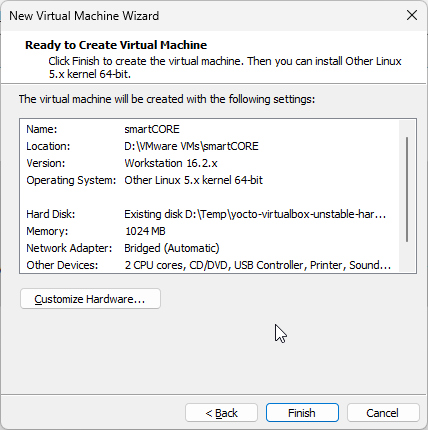
Then we first save the machine with "Finish":
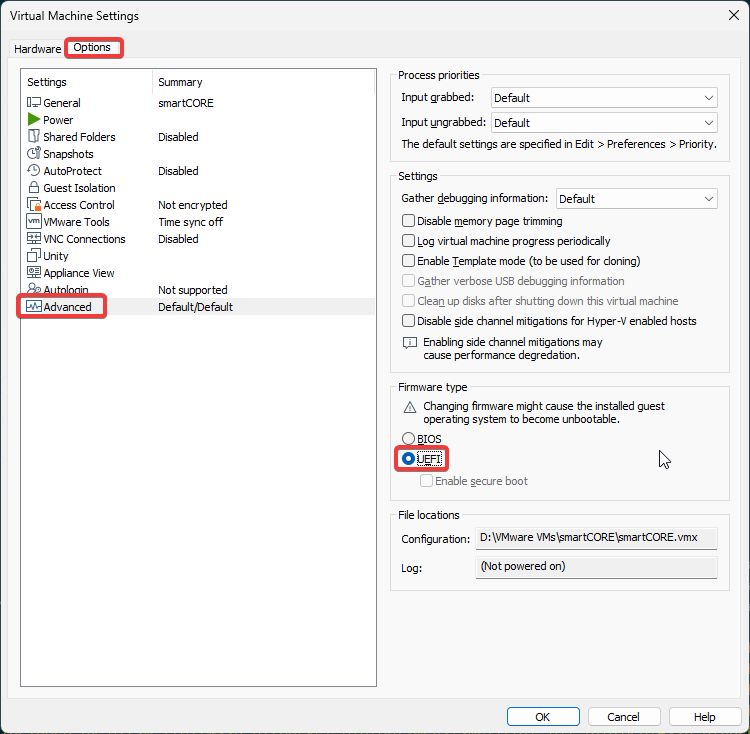
Use "Edit virtual machine settings" to customize the machine a little:

It is important to change the firmware type to "UEFI", otherwise the machine will not boot:
Optionally, the "CD/DVD", "Sound Card" and "Printer" devices can be deleted using the "Remove" button:

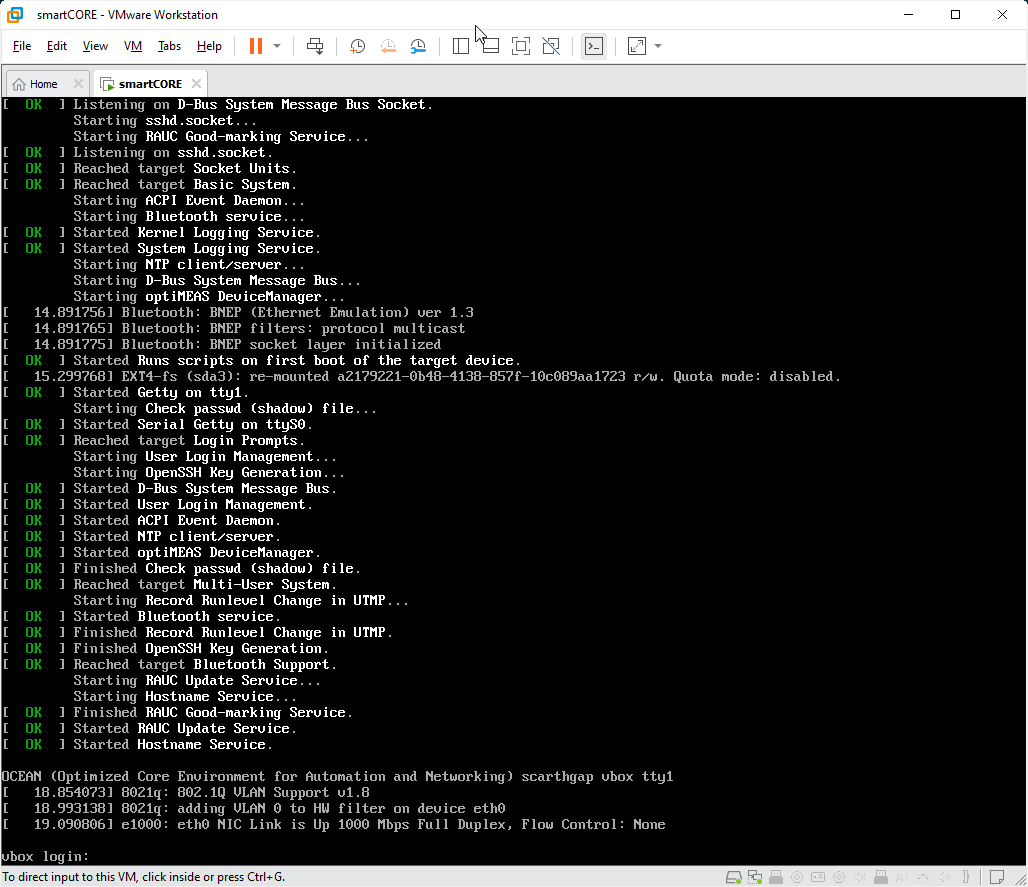
The dialog is then closed with "OK" and the machine is started with "Power on this virtual machine":
The optiCONTROL software should now find the virtual machine in the network:
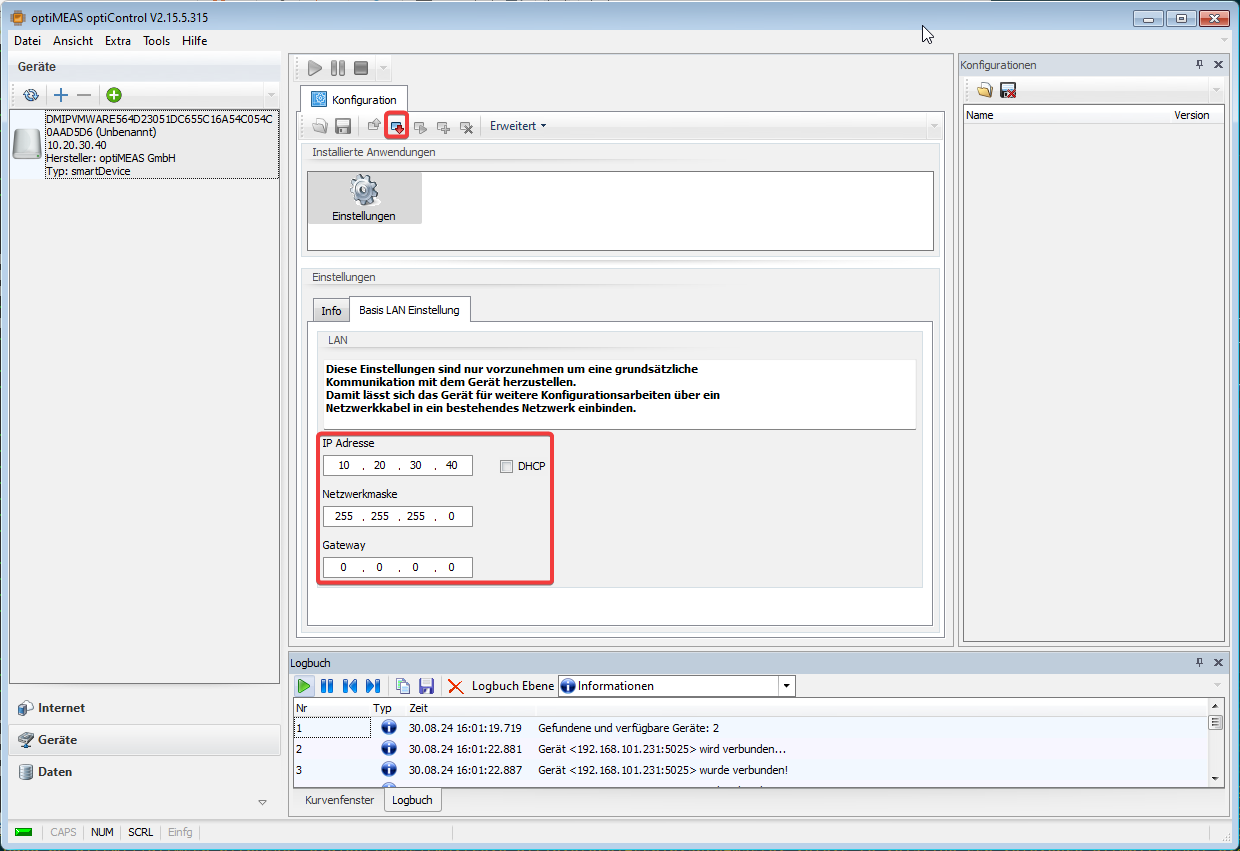
The network settings must be adjusted so that the virtual machine can access the Internet. In the simplest case, by activating DHCP.