Tools
Map
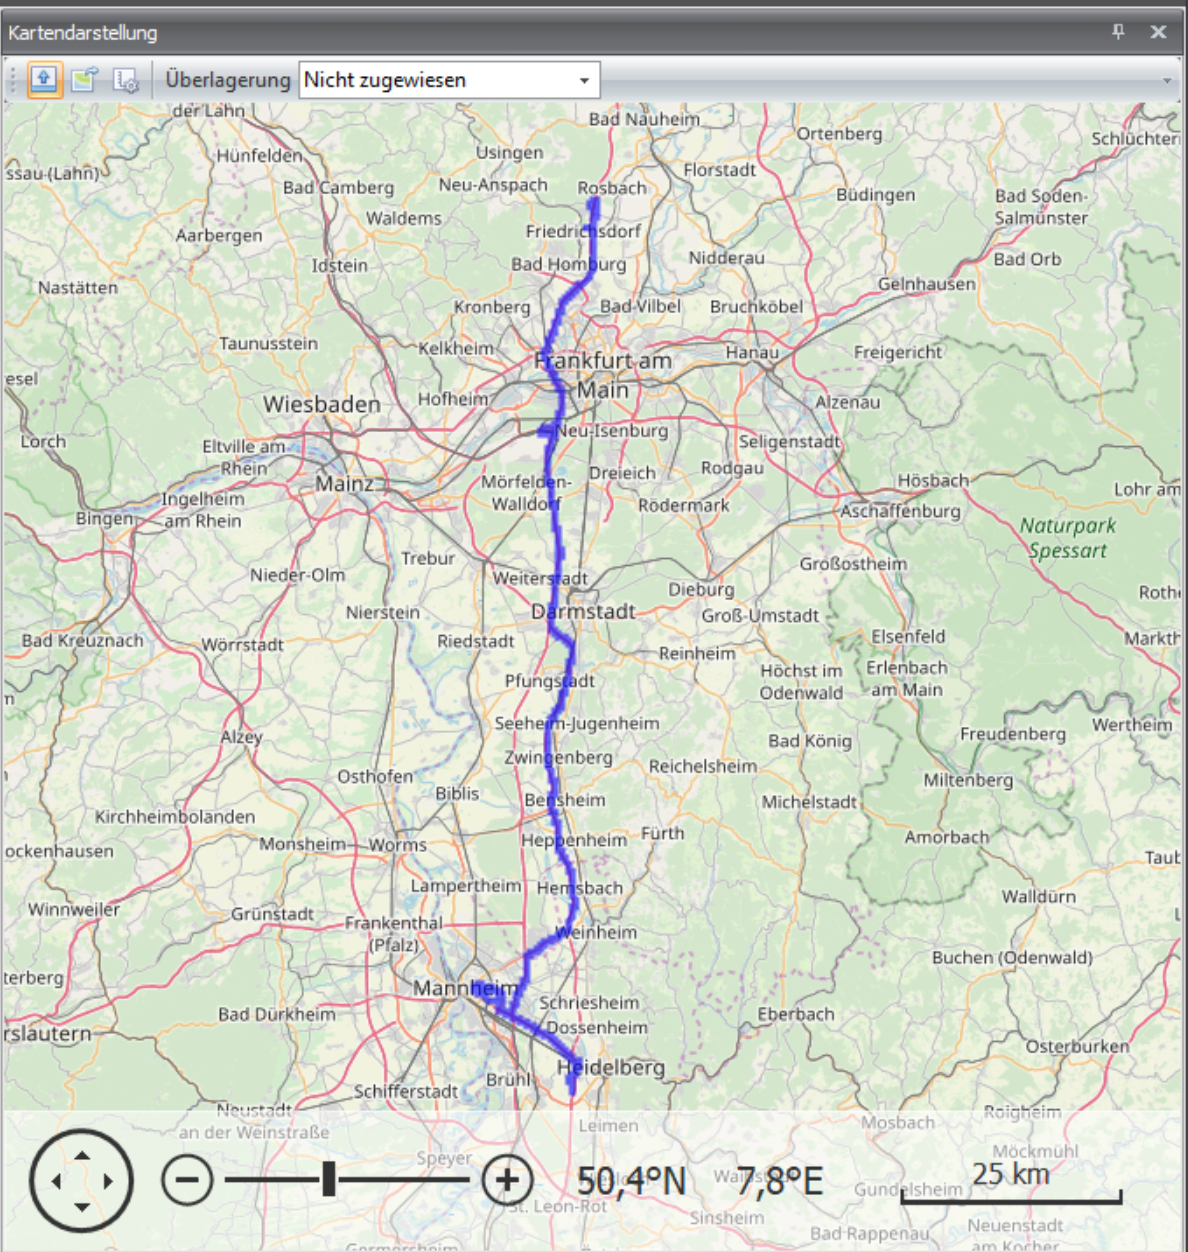
GPS data from OSF files can be loaded in the map window and the corresponding routes can be displayed. As soon as an OSF file containing the signals "gps_longitude" and "gps_latitude" is dragged and dropped over the window, is dragged and dropped over the window, the coordinates are displayed on the map. The user can choose between openStreetmap and BING maps.
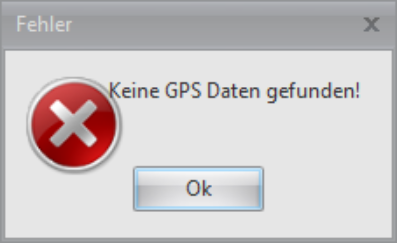
If there is no GPS data in the OSF file, the following message is displayed:
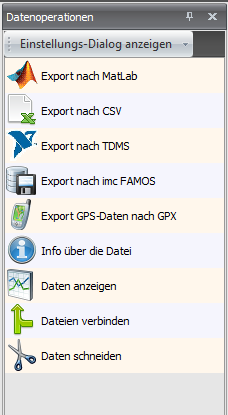
File operations - editing and exporting data
In the Internet and data areas where the user has direct access to measurement data, the optiCONTROL software offers optiCONTROL software offers functions to export and edit the Osf(z) measurement data format to other data formats. export and edit it.
The following export data formats are available:
- Matlab
- CSV - text format
- NI TDMS
- imc FAMOS
- GPX
As soon as a file has been converted to another format, it is saved in the same directory
as the original OSF file. This file can be accessed via the context menu item "Show data in file explorer".

Editing and management functions:
- Info about the file - Display information about the file content (number of signals, etc.)
- Display data - display data in a curve diagram
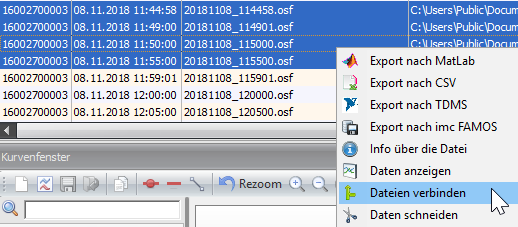
- Join files - join several OSF files together
- Cut data - cut out certain signal parts

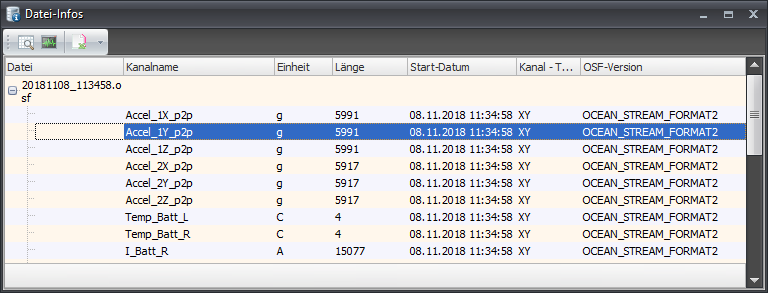
Display information about file
This function can be used to display information about the OSF file.

The following file information is displayed:
- All contained signals with name and unit
- Signal length - number of values
- Start date of the signal
- OSF version
Combine files
To combine several OSF files and save them in a single file, the desired files must be selected in the Data
or Internet area, the desired files must be selected and the "Join files"
function must be executed.
The following dialog is then displayed in which you can select whether all or only certain
signals should be transferred to the new file. Next, a new file name
must be specified. The process is completed by clicking on OK.
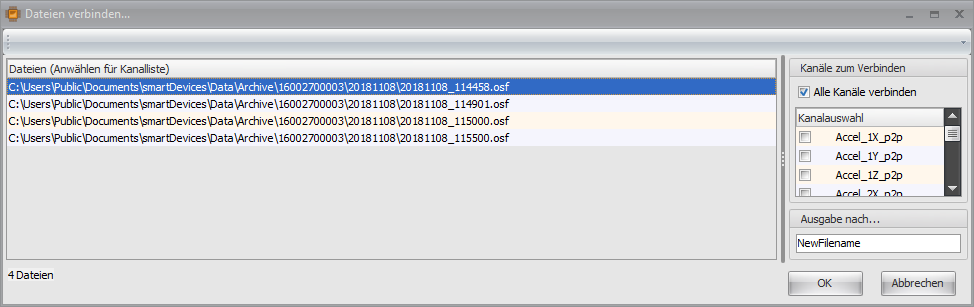
The newly created file is then saved in the "Calculated" folder in the data area.

Curve window
Measurement data of type Osf(z) can be displayed and analyzed in the curve window. As soon as a
file is dragged and dropped into the window or the file operation "Show file" is triggered, the signals of the file are displayed.
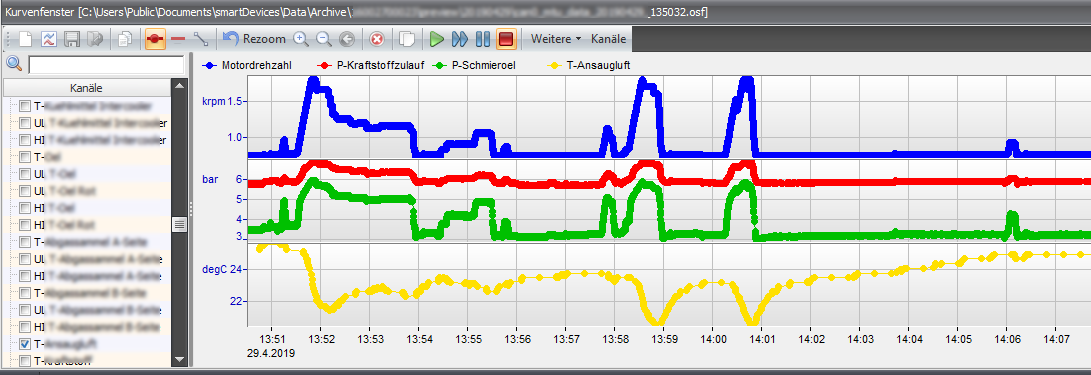
All signal names of the file are displayed on the left-hand side. To display a specific signal
the checkbox in front of the name must be set, as all signals are hidden by default after loading
all signals are hidden after loading the file. The search field above the signal list can be used to filter the list by name and search for a specific signal.

The toolbar offers some additional functions to visualize the measurement signals.
![]()
The most important functions are described in the following table:
| Icon | Description |
|---|---|
| Deletes the currently loaded data from the curve window | |
| Automatically displays the first 10 signals in the curve window | |
| Copies the current curve window view to the clipboard, e.g. to copy it into a Word document. | |
| Displays the measured values as thick dots | |
| Displays the measurement data plot with thicker lines | |
| If 2 measurement points are too far apart, they can be linked with this function. | |
| Zoom in and out of the data |
Show multiple files
If the option "Extra-->Settings-->Curve display-->Allow multiple files at the same time"
is activated, several OSF files can be displayed simultaneously in the curve window. To do this, simply
drag several files into the curve window one after the other. If this function is active, the
file name takes precedence over the signal name in the signal list:
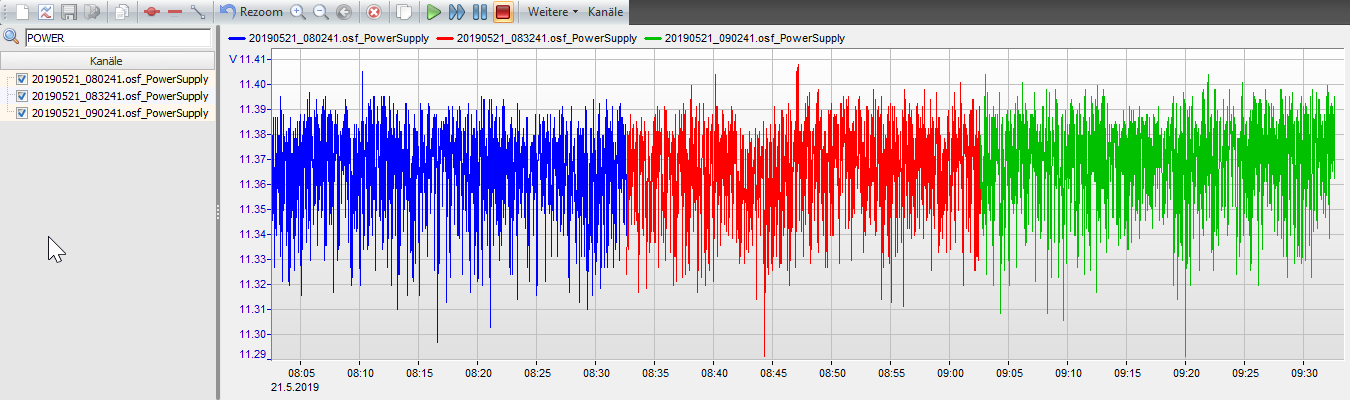
This option makes it possible to display several files with the same data from the same device at the correct time in the curve window.
Logbook
All messages from the devices and optiCONTROL are displayed and collected in the logbook window.
The logbook can be called up in the main menu under "View -- > Tools".
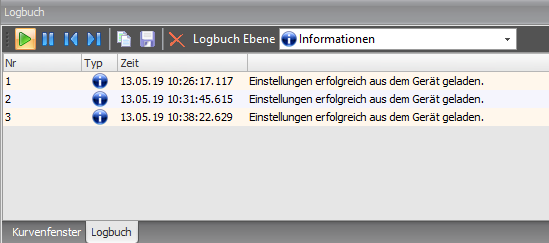
The logbook window offers the following functions:
- Saving all messages in a separate text file
- Delete all messages
- Filter view by message type (info, error, debug, warning....)
- Copy messages to clipboard