Devices section
In the Devices section, we initially only see an overview of the locally connected devices on the left-hand side of the window.
connected devices. When the program is started, a device search in the local network is always
network and all devices found are displayed in the list. To connect to a device
only the desired device needs to be selected. The refresh button ![]() can be used to run the device search again to find newly connected devices.
can be used to run the device search again to find newly connected devices.
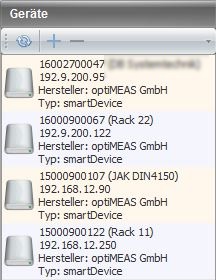
With the plus button ![]() you can manually enter a device that is not found by the search, but for which the IP address is known and it is available in the network.
you can manually enter a device that is not found by the search, but for which the IP address is known and it is available in the network.

In this list, only the devices that are connected in the same network are found and displayed. are connected.
Configuration
If a device is selected from the list, an overview of the applications installed on the device opens on the right-hand side. installed applications on the device. The "Settings" application is always installed on a device by default. installed on a device. Several applications can be installed on a smartDevice at the same time installed on a smartDevice, but only one is active at a time. The smartCORE app is always activated by default.
This is the standard application for optiMEAS systems. If another app is installed, please contact optiMEAS directly.

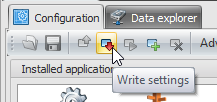
The most important global functions are available in the toolbar.
![]()
Save settings
Please note that after each change, the "Write settings" button in the toolbar
must be pressed after each change so that these are applied to the device. The settings are then
then saved persistently on the device.
Installing, updating or deleting an app
To install or update a new app on a device, the following steps must be carried out.
- install / update app
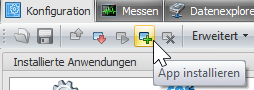
- select and open the app file (always with the extension ".bin") in the open dialog. The bin file is then loaded onto the device and the installation process is started.
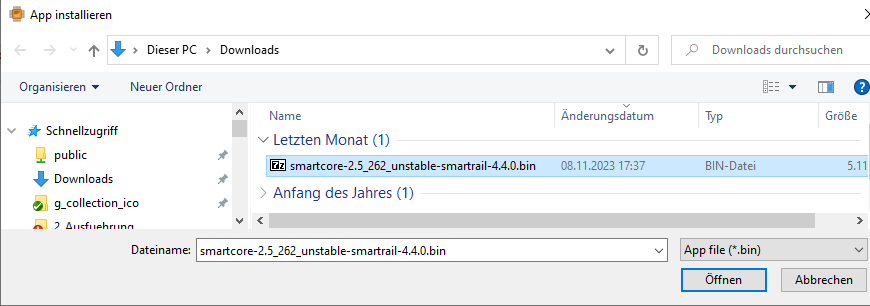
- after approx. 30 seconds, perform the device search to read in the new device information again
and reconnect to the device.

It is recommended to restart the device after installing, updating or deleting an app!
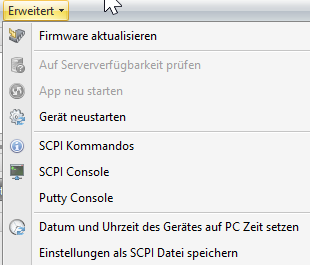
Advanced
The Advanced menu lists system functions, e.g. to perform a firmware update, set the system time of the device or perform a restart.
Firmware update
The system offers the option of installing a completely new firmware version on the device. Reasons for the installation can be
- New or updated libraries
- New Linux kernel
- New or updated drivers
- New smartCORE app version
In order to update the firmware, the firmware file with the extension *.raucb
(e.g.: yocto-smartrail-tx6-unstable-firmware-smartmini-minimal.raucb ) and the optiMEAS
software "optiControl" required. The device must be connected to the PC via Ethernet.
The connected device is displayed in the device section of the software (important: the PC and device
must be in the same sub-network).
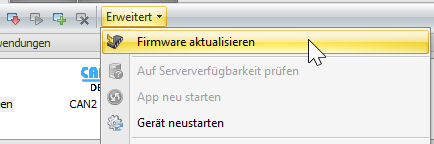
![]()
Select the device and select the menu item "Firmware Update" on the right-hand side under Advanced.

Select the rauc file in the following selection dialog. The update process is then started.
The update normally takes about 5-10 minutes. The device must not be disconnected from the power supply during this time!
The following dialog appears showing the progress of the update process.
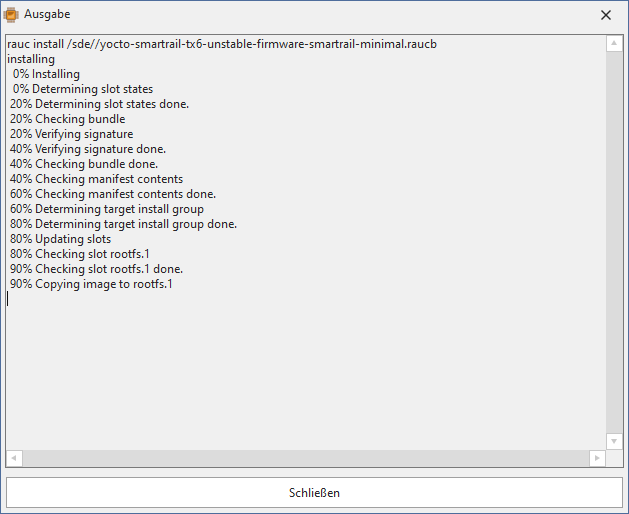
As soon as the update is complete, the user can

To determine the current firmware version of a smartDevice, the optiControl
software can be used. If the device is connected to the PC and the software is started, the bsp version (BoardSupportPackage
info page, the bsp version (BoardSupportPackage) can be read out.

Restart device
If necessary, you can restart your device manually with this function.
Restarting a device normally takes 10-20 seconds. To reconnect to the device simply run the device search until the device is displayed again.
Settings - Device manager
The so-called device manager is a process that runs on all smartDevices devices and manages all
important global system settings. You can access the settings dialogs of the device manager
can be accessed by clicking on the "Settings" icon after selecting a device from the list.

The device manager offers the following functions within the various tabs:

- Info: Displays system information on hardware and software
- Network adapter: Information on the available network interfaces
- WLAN networks: Offers the option of integrating the device into an existing WLAN network
- Modem: Settings to set up an Internet connection via LTE modem
- Time & date: Read out and set the system time.
- Hotspot: Set up a WLAN hotspot via the device's mobile modem
- Cloud server: Set up a cloud server connection to upload system information and measurement data
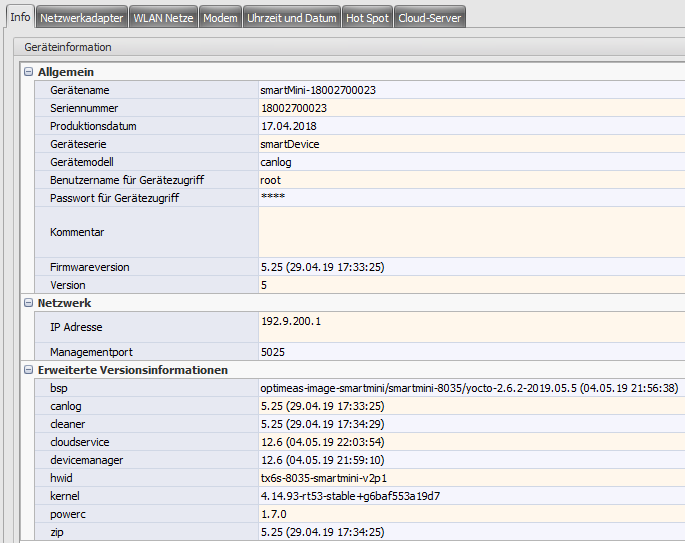
Info
The device information is displayed under the Info tab. This includes, for example, the device model, the serial number and the firmware version.
To gain access to the data explorer later, a user name and password must be specified here.
The IP address and management port are displayed in the "Network" area.
The "Extended version information" area shows the version number of drivers and applications
applications located on the device.
Network adapter
Network settings can be changed under Network adapter. The following is displayed here
available adapters, a status message and the corresponding IP address settings.
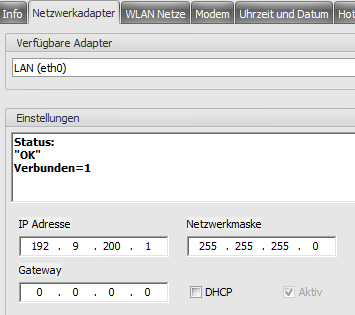
If a DHCP server is running in your network, you can also activate the DHCP functionality of the activate the DHCP functionality of the device. In this way, you can add the device to an existing DHCP network. network.
Activating the DHCP functionality of the device without a running DHCP server may result in your device your device may no longer be found. Only use this function if you are sure that a DHCP server is available.
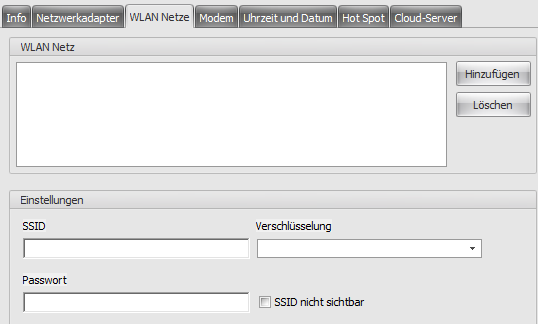
WLAN networks
If you want to connect the device via WLAN, you must enter the corresponding network under the "WLAN networks" tab. enter the corresponding network.
If you wish to use this function, please contact optiMEAS to find out which USB WLAN stick is currently recommended for the smartDevice devices.
The following steps must be carried out:
- insert the WLAN USB stick into the smartMini / smartRAIL device
- start or restart the device
- activate the WLAN adapter under the "Network adapter" tab

- click the "Add" button under the WLAN networks tab
- select the entry and fill in the fields
- SSID - Enter the name of the WLAN network
- Select the encryption method
- Enter the password of the WLAN network
- If the network is not visible, activate the "SSID not visible" option
- write settings to the device
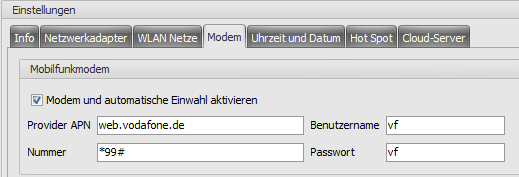
Modem
The connection information for a mobile connection is set in the "Modem" tab. To do this, the "Activate modem and automatic dial-in" option must be activated and a SIM card must be inserted into the device (see Insert SIM card ). It is important to deactivate the PIN query for the SIM card beforehand and to enter the correct provider information.
This information, such as the provider APN, can be found on the support websites of the respective provider. can be found on the support pages of the respective provider. In newer software versions of the device firmware, only the APN must be entered, user, password and number are not required.
 Connection information for a Vodafone SIM card and activated routing function.
The APN (Access Point Name) is the name of the gateway between a mobile network (e.g. 3G or 4G) and an external data network (e.g. the Internet). Further information on this topic can be found here: Wikipedia
If the modem is activated, a page with status information on the mobile connection is displayed the next time you connect.
mobile connection is displayed:
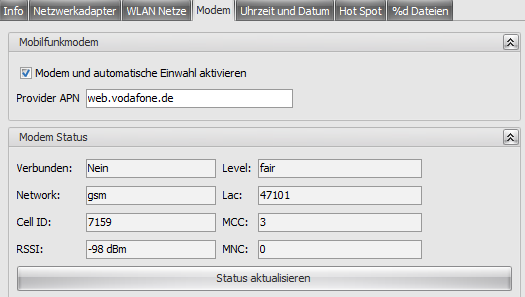
The "Update status" button is used to update the modem information. With this information can be used to check whether a connection via modem is working or not.
APN providers
The following table lists APNs of the most common providers in Germany for 3G/4G (LTE) networks are listed:
| Provider | APN |
|---|---|
| Vodafone | web.vodafone.de |
| Telekom | internet.t-mobile |
| Eplus Internet | internet.eplus.de |
| O2 DE-Internet | surfo2 |
| A1 | m2m.tag.com |
Further providers and their APNs are listed under the following URLs:
- https://www.lte-anbieter.info/ratgeber/apn/uebersicht.php
- http://sim-karte-gratis.de/apn-einstellungen
Hotspot
In the "Hotspot" tab, it is possible to set up a WLAN hotspot with which other devices can can dial into the Internet via the modem connection of the smartDevice (smartMini or smartRAIL). can connect to the Internet.
If you wish to use this function, please contact optiMEAS to find out which USB WLAN stick is currently recommended for the smartDevice devices.
The following steps must be carried out to set up a WLAN hotspot:
- the smartMini device must have an active modem connection and the "Activate routing?" option must be switched on. See Set up modem.

- insert the USB WLAN stick into the USB socket of the smartMini system and restart the device.
- after the restart, the WLAN0 adapter must be activated under Settings --> Network adapter.
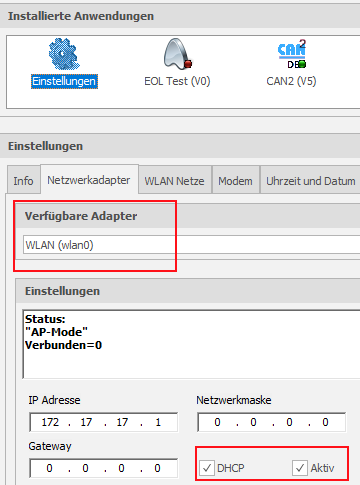
- now activate the hotspot function in the "Hot Spot" tab and enter the corresponding parameters in the three fields:
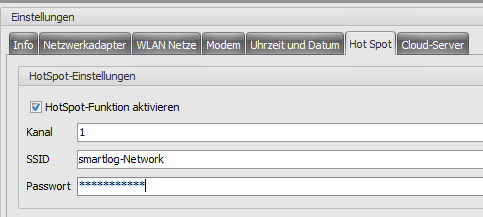
| Field | Description |
|---|---|
| Channel | Select your channel ID. Normally, IDs are a number between 1 and 13. It is recommended to use a channel with ID 1, 6 or 11. Wikipedia: WLAN channels |
| SSID | Enter your network name. |
| Password | Enter your password here. |
- the last step is to write the settings to the device using the "Write settings" button.
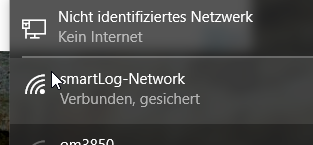
Now restart the device. The SSID network name should then appear in the available WLAN networks.
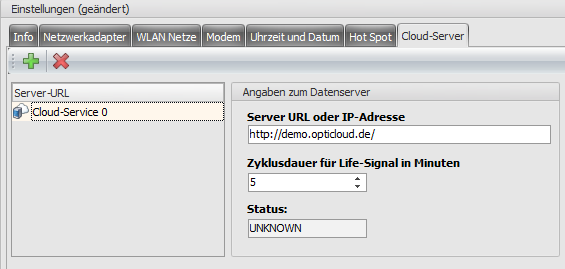
Cloud server
The "Cloud server" tab is used to enter the optiCLOUD server(s) to which the device should report and deliver its data.
With the plus button ![]() a new entry is added to the server URL list and with the red cross
a new entry is added to the server URL list and with the red cross ![]() the selected entry is removed. The corresponding settings can be adjusted on the right-hand side.
the selected entry is removed. The corresponding settings can be adjusted on the right-hand side.
Several servers can also be entered.

The following parameters can be edited:
- Server URL: The optiCLOUD server address
- Cycle duration for life signal: At what interval in minutes should the device report to the server and send a life signal (PING message)?
In order for the changed settings to be saved in the device, they must be written to the device.
optiCLOUD - Set up server connection
If a SIM card is now installed in the device, the settings must be set so that the connection to the server can be established. If the device is connected with an Ethernet cable, the server connection can be set up in the optiCONTROL software. Select the device, you can go to Settings in the installed applications. There you will find the tab Modem tab. It is important to check the box to activate the modem.
APN stands for Access Point Name. Mobile devices use these access points to log into the mobile data network. Each provider has different access points. You will therefore receive all the necessary information for the fields below from your provider.
You can find more information on the subject of access point names here.
With the Write settings button, which can be found above the installed applications, the changes to the settings are
changes to the settings are saved and written to the device.
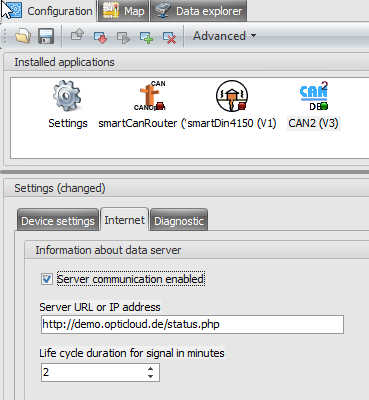
If you select another installed application, you will find the Internet tab there. Here you must
The check mark that enables communication with the server must also be set here. The
server URL can be obtained from optiMEAS. In the second field you can set the interval
in which the device should report to the server. The view of this menu may differ slightly depending
may differ slightly depending on the version, but the required setting fields are the same.
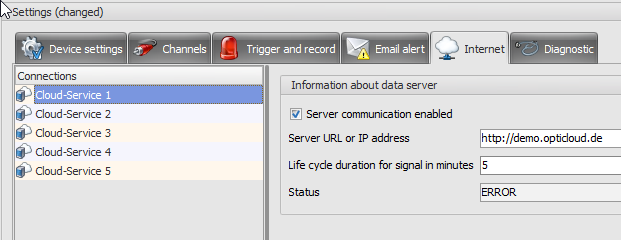
Here is another possible view.
Data explorer
To have access to the data explorer, it is essential to set the user name
for device access and the password for device access must be set in the configuration so that you can gain access via the FTP
server to gain access. The data explorer allows access to the data stored on the device.
on the device. This includes all log and measurement data as well as data for installed applications.
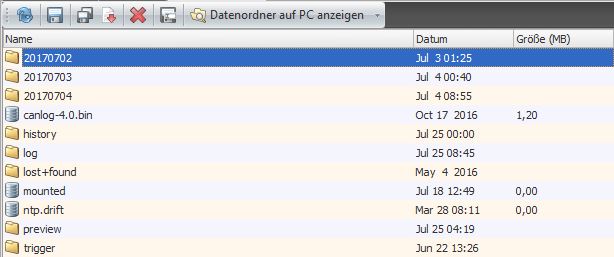
This data can be saved from the device to the local PC. However, data can also be be loaded onto the device, or deleted. If entries are not displayed immediately press Refresh.