Deviceview
DeviceView
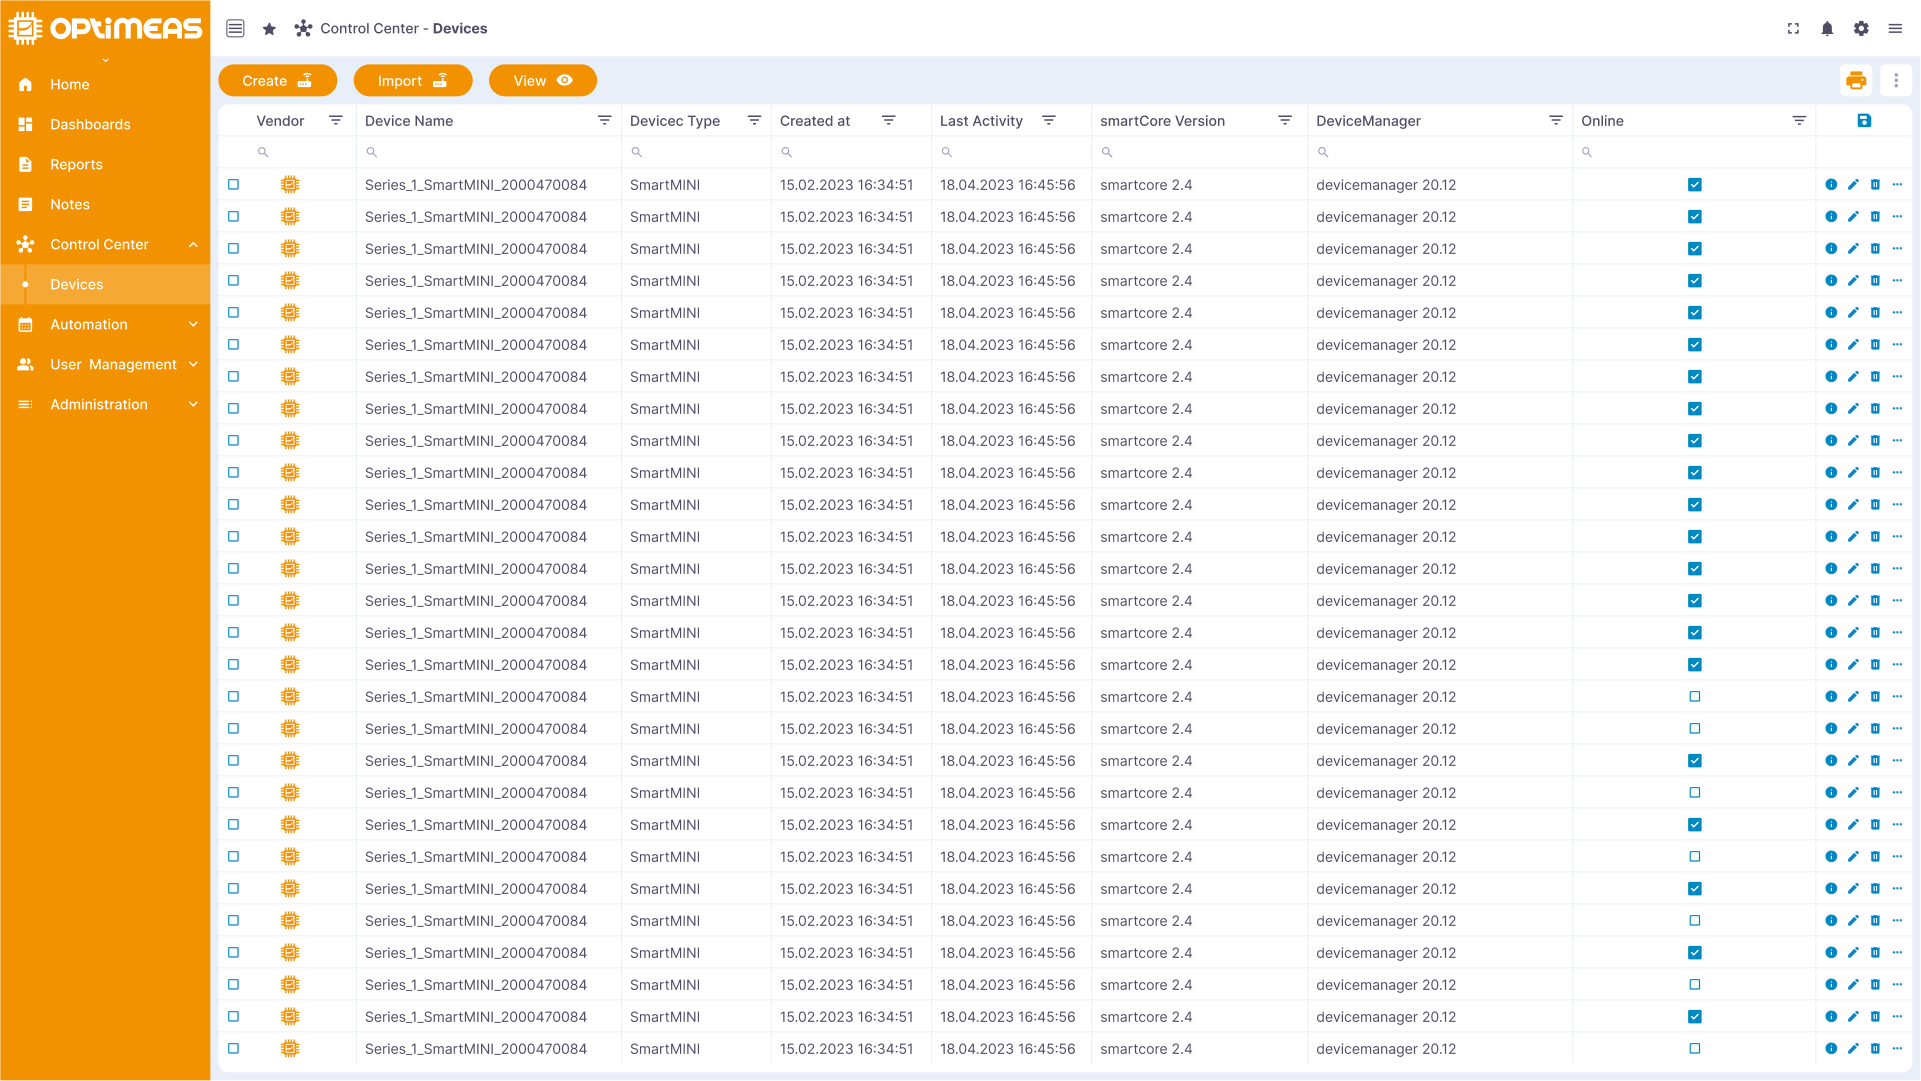
The DeviceView is the central point from which you interact with your connected devices and where you can view all the necessary information about your devices at a glance. While dashboards are the main point of contact when it comes to visualizing incoming data, the DeviceView is the central point of contact for fleet and device management. It is a powerful tool to optimize your work in our IoT platform. Through individual configuration, you can ensure that you always have the right information at hand and can manage your tasks effortlessly. The ability to create different views for the same devices makes this area of the platform extremely flexible and adaptable to the changing requirements of your daily work. In this chapter, you will learn how to design a DeviceView so that it is perfectly tailored to your daily work.
|Device View Firmware Software| Device View Measurement Data|
| |
| |
|
Individual configurations
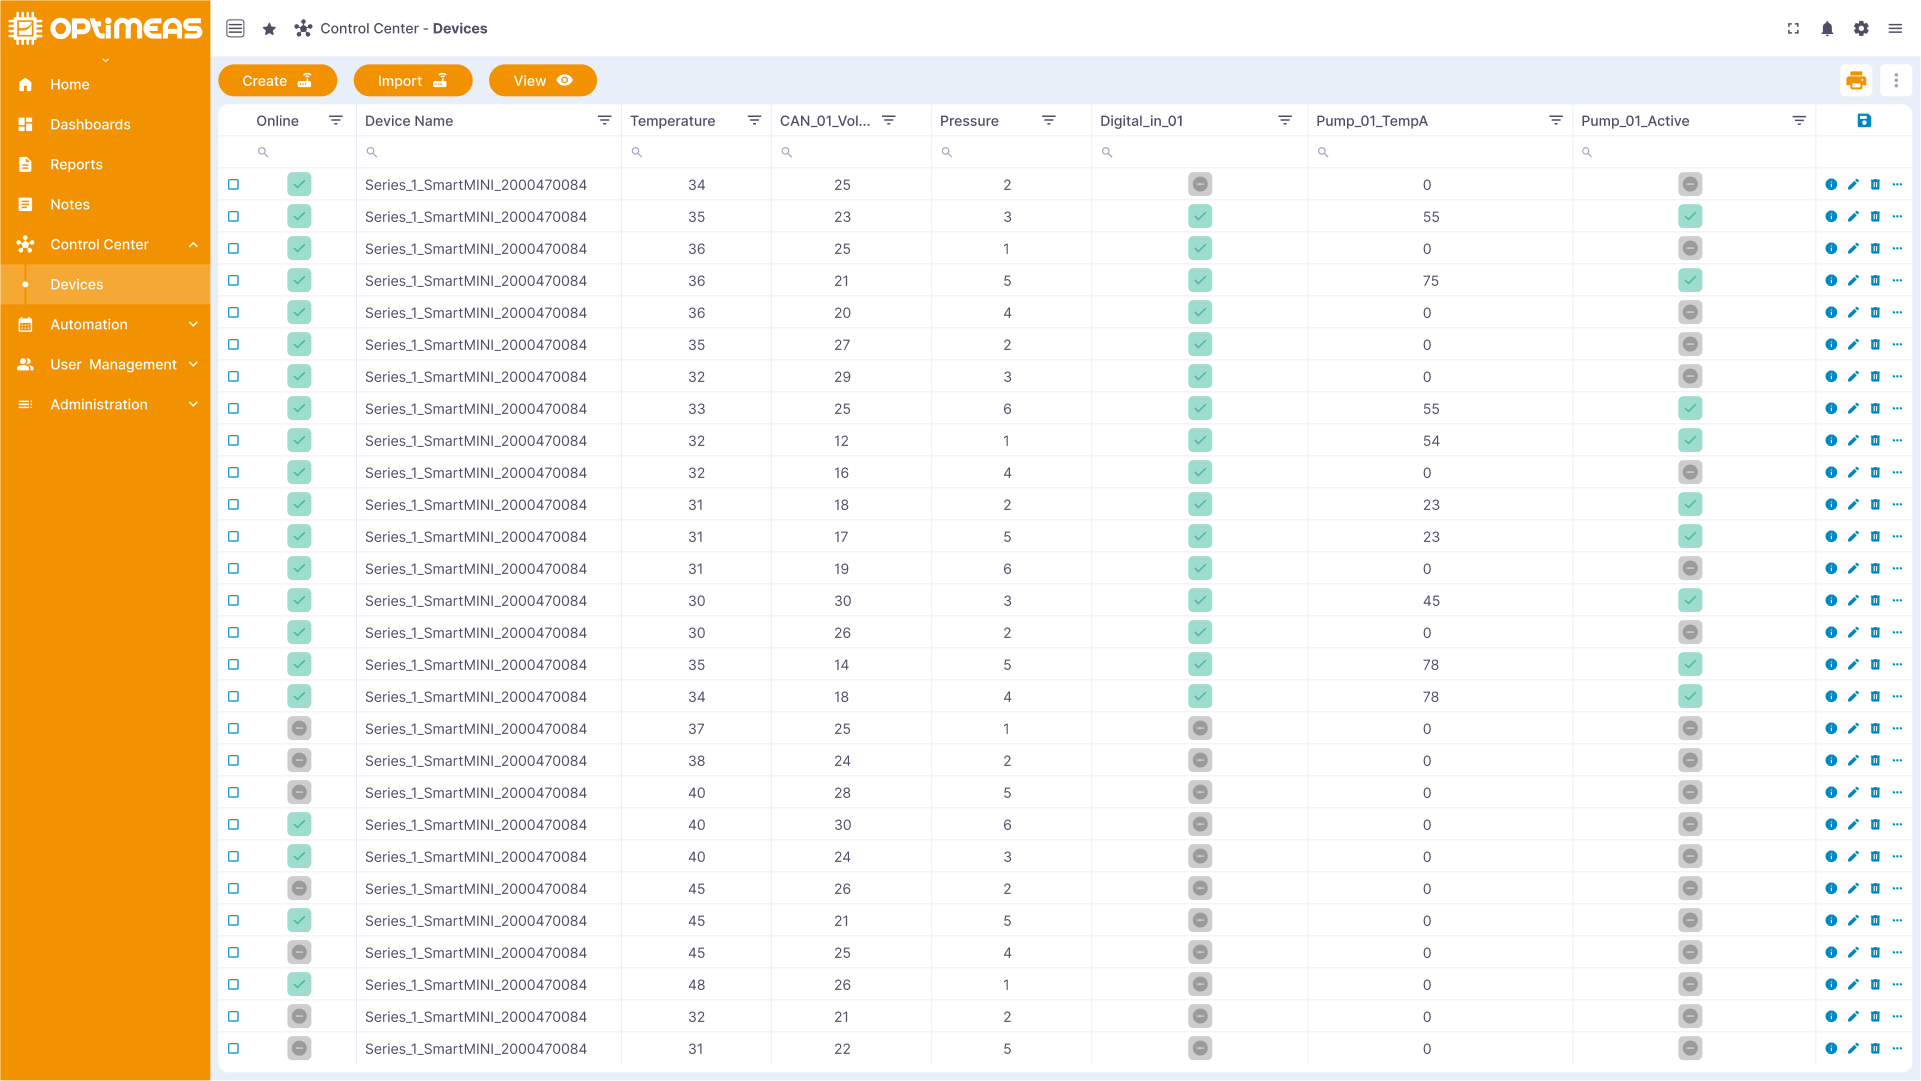
As your tasks can vary from day to day, you have the option of creating as many different views as you need. Each view can be individually adapted to the specific requirements of your current tasks. This flexibility allows you to always see exactly the information you need for your work and also to customize the actions available on the page accordingly. With a DeviceView you have the freedom to customize both the structure and the content of the table according to your needs. This means that you can not only define the individual columns of the table, but also specify what information should be displayed in these columns and how this information should be displayed. In addition, you can also configure the existing buttons on the DeviceView page completely freely according to your requirements. By tailoring the view exactly to your requirements, you minimize the time spent searching for information and actions. This allows you to complete your tasks faster and more efficiently.
DeviceView - Configuration view
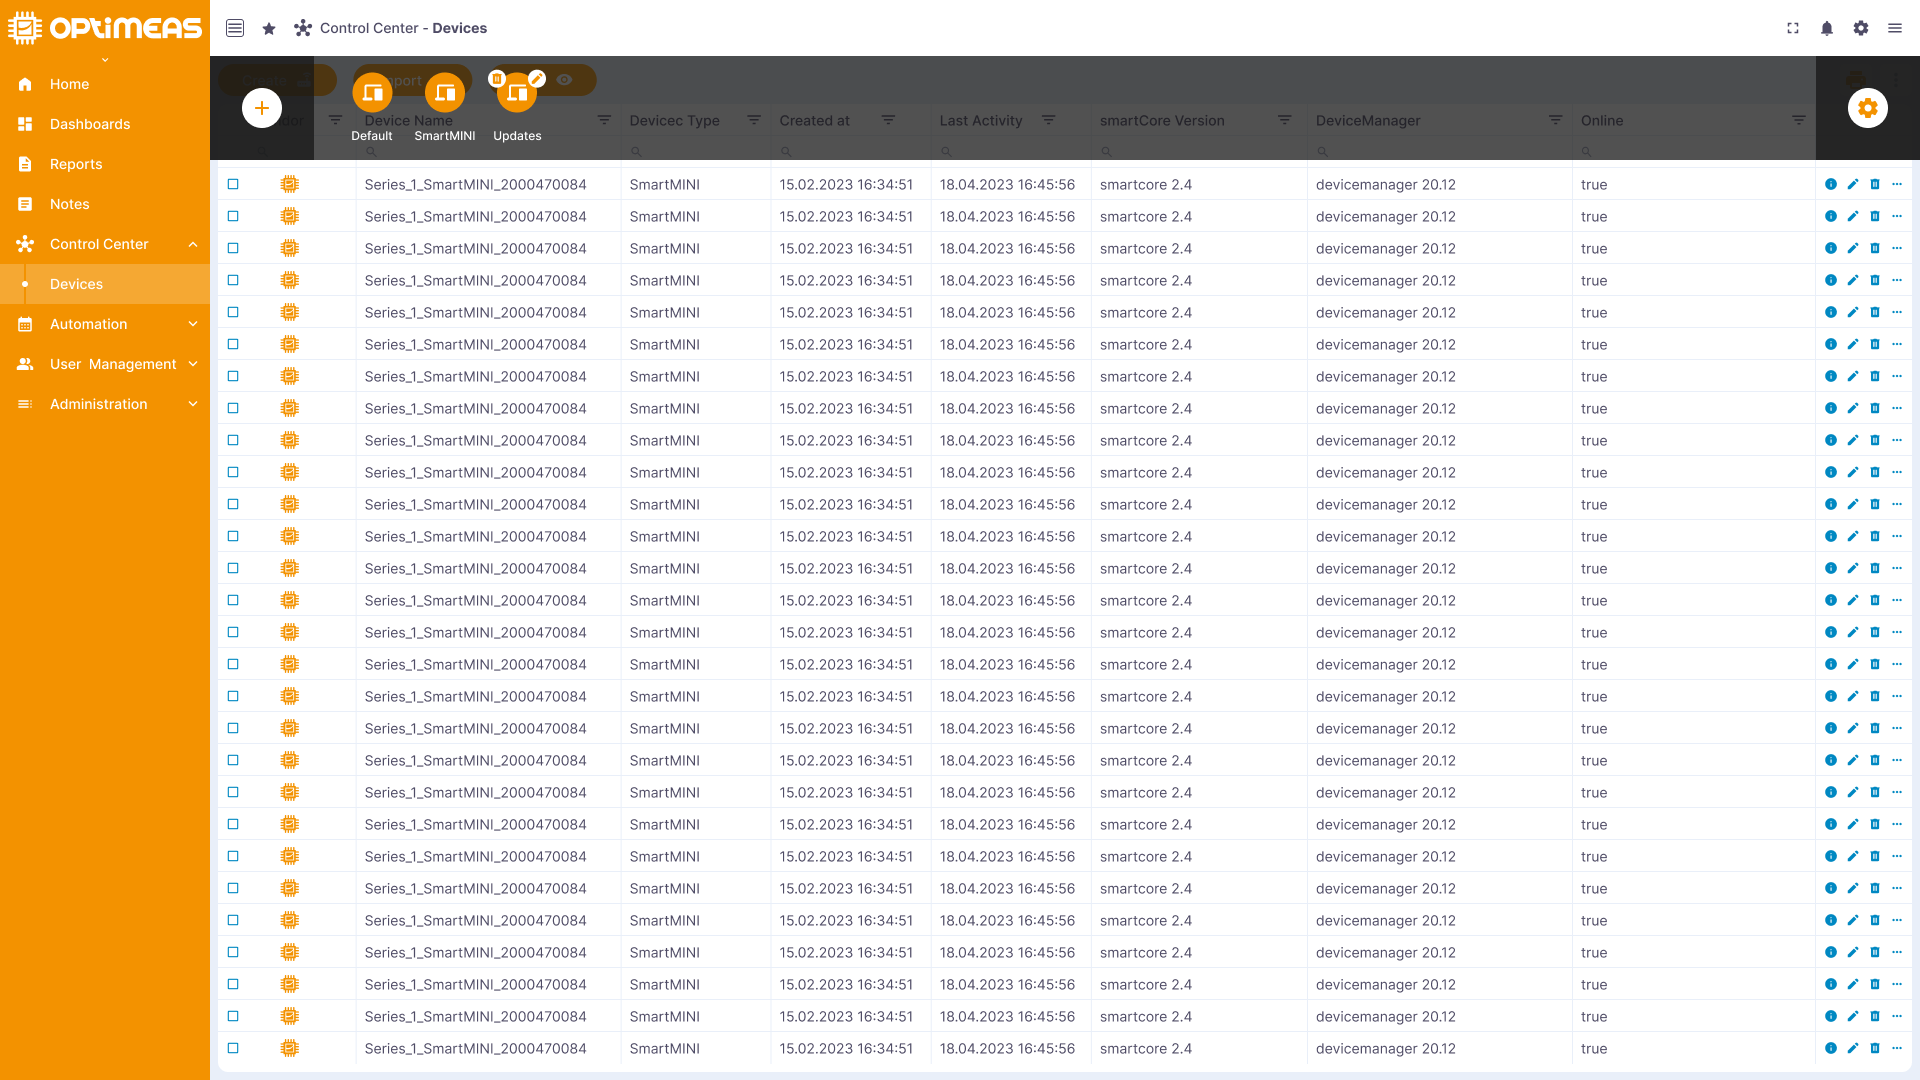
To create a new view, simply click on the "View" button in the top button bar. After clicking, a black bar with the different views appears at the top of the screen. To add a new view, click on the "+" symbol on the left-hand side.
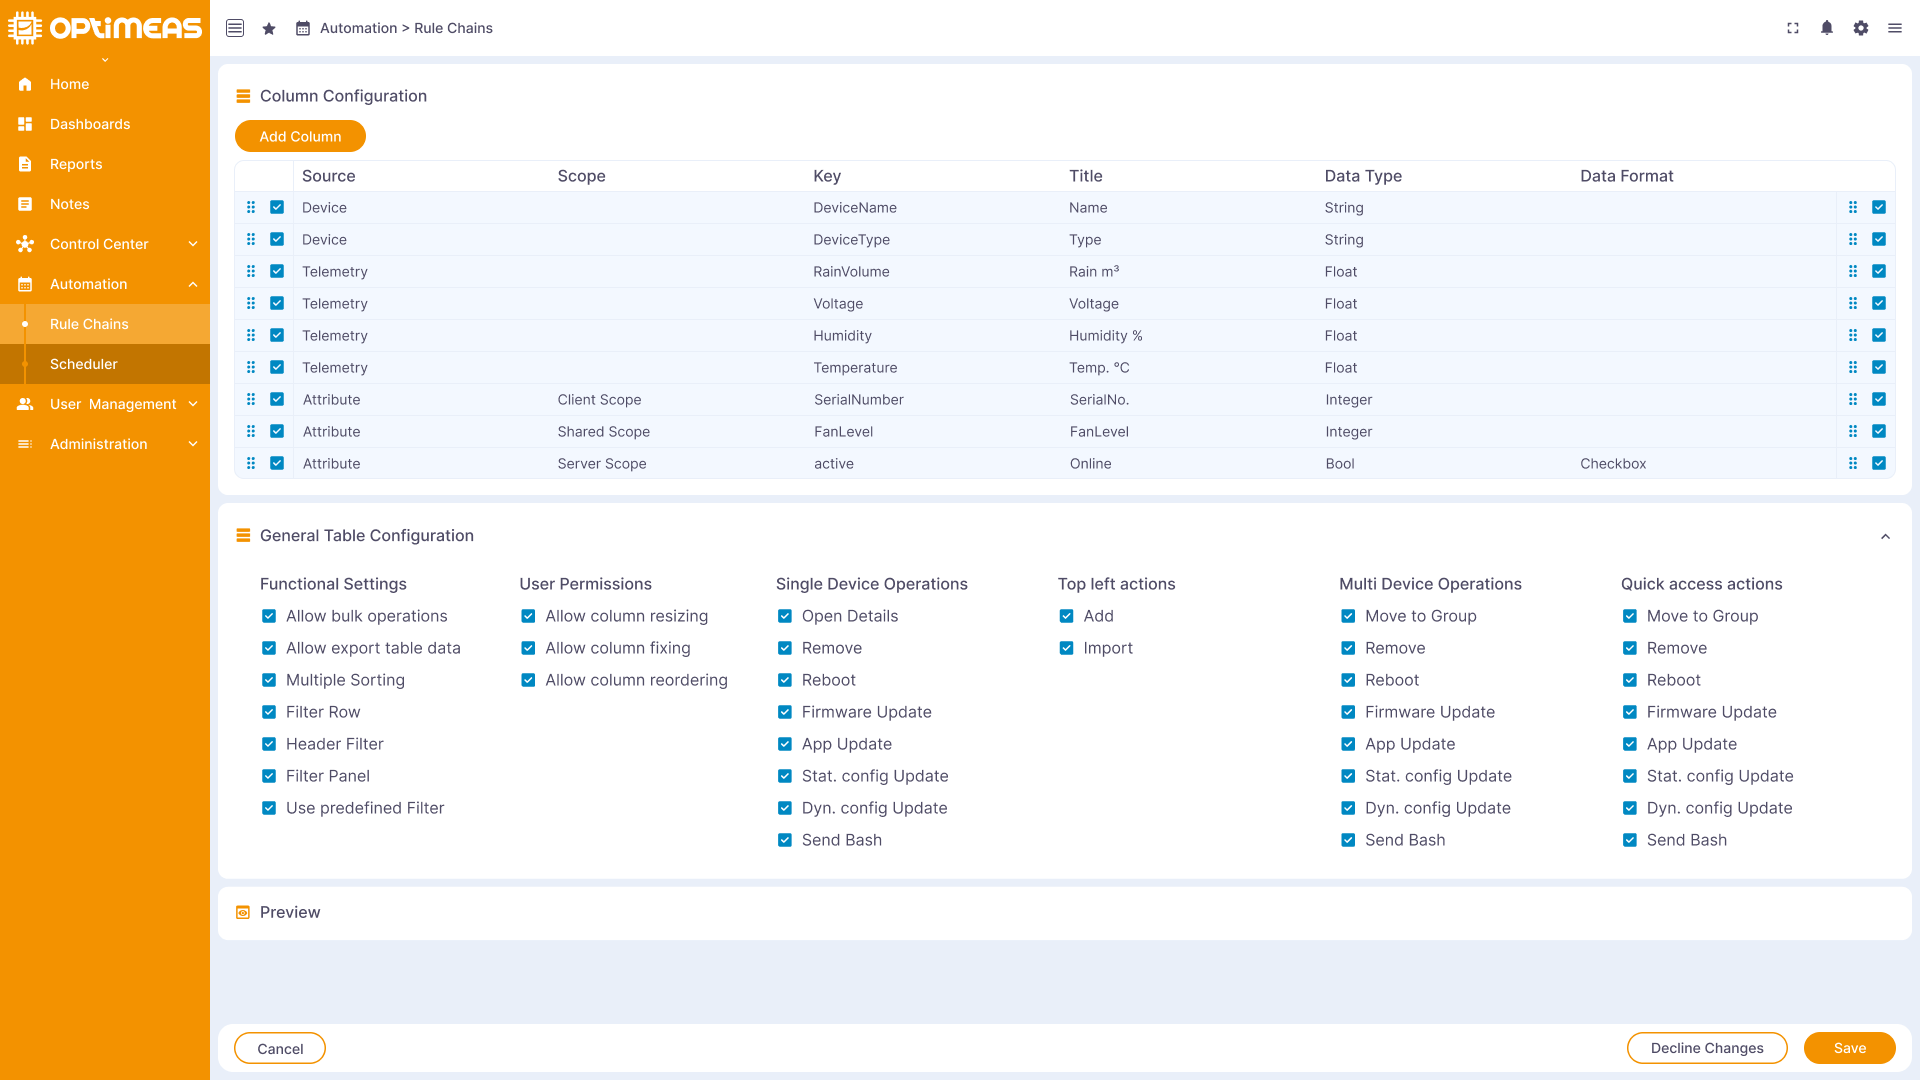
After clicking, you will be taken to the configuration interface of a view. This is divided into 3 parts and consists of:
- The table configuration regarding the selection of the data and information to be displayed, as well as their formatting.
- The general table and action configuration with which you can set your view around the table and some of the basic functions of the table
- The preview of your current data and table configuration.
DeviceView - Configure view - Data and information
As already mentioned, the top section contains the selection of data and information. To add another column to the preselection in the table, simply click on the "Add column" button. The configuration wizard now opens, which you can use to fill the new column with content.